GOLF COURSE TOUR
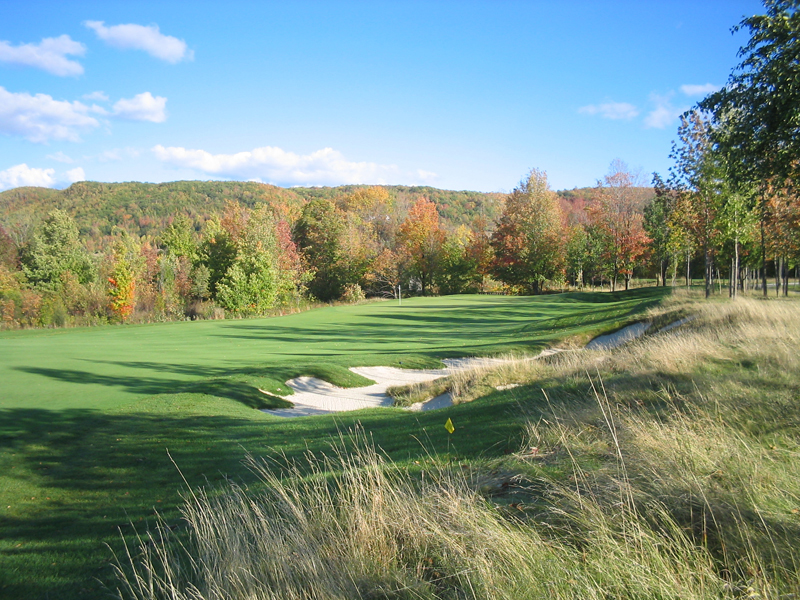
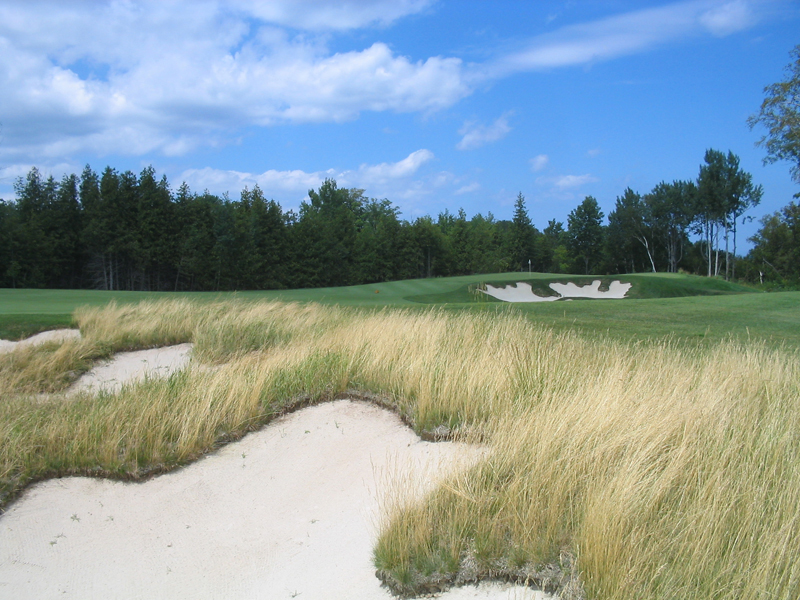
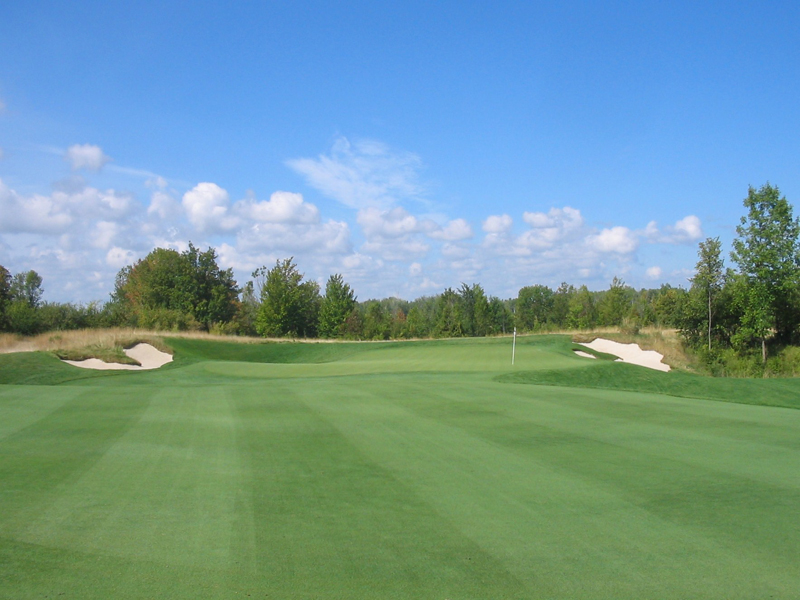
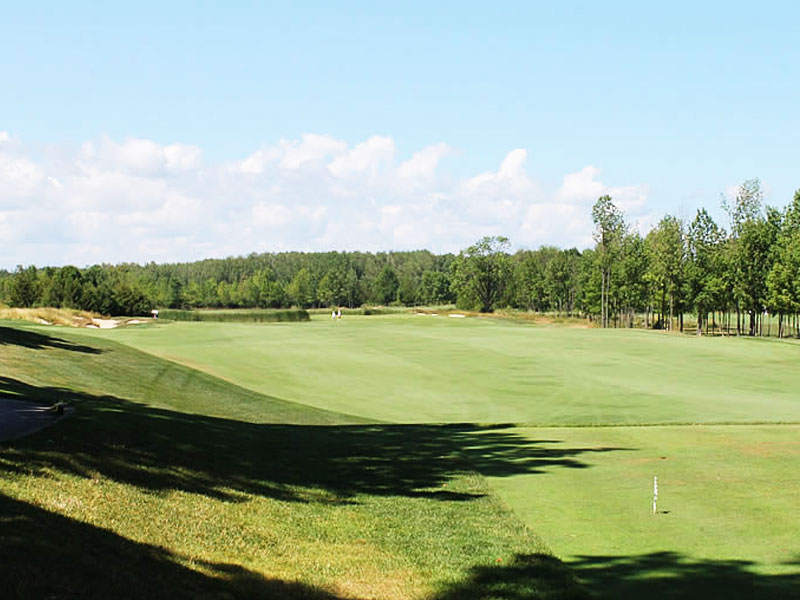
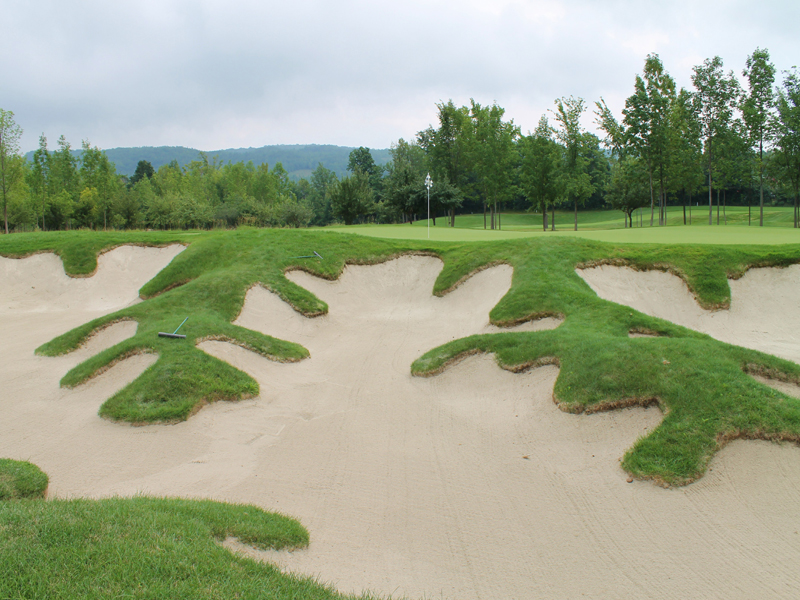
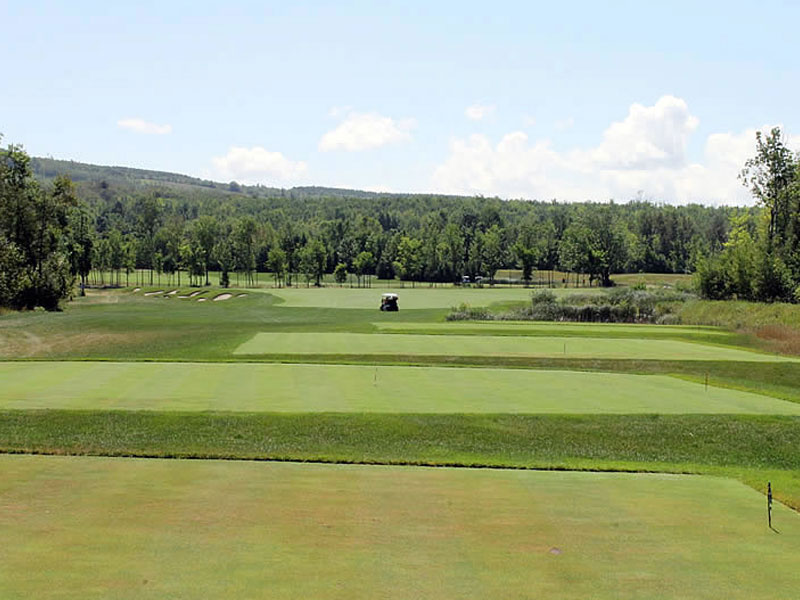
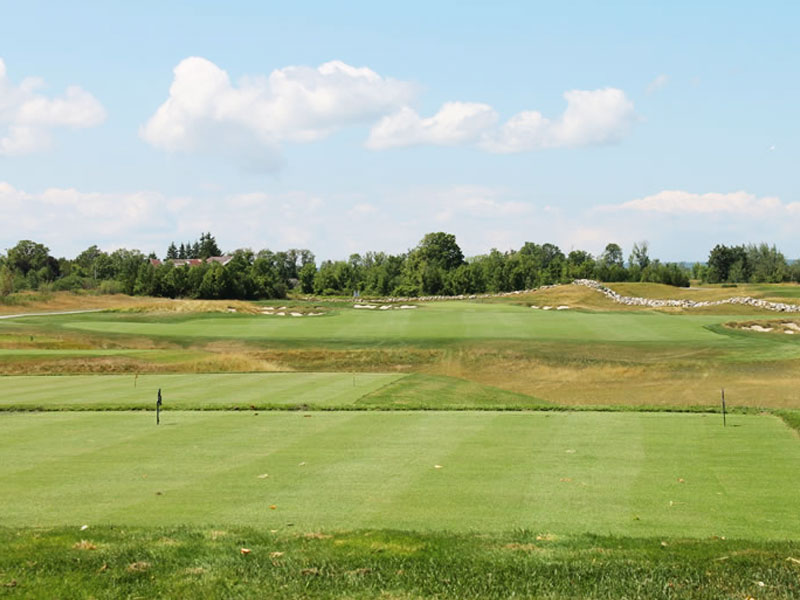
1st Hole – Par 4
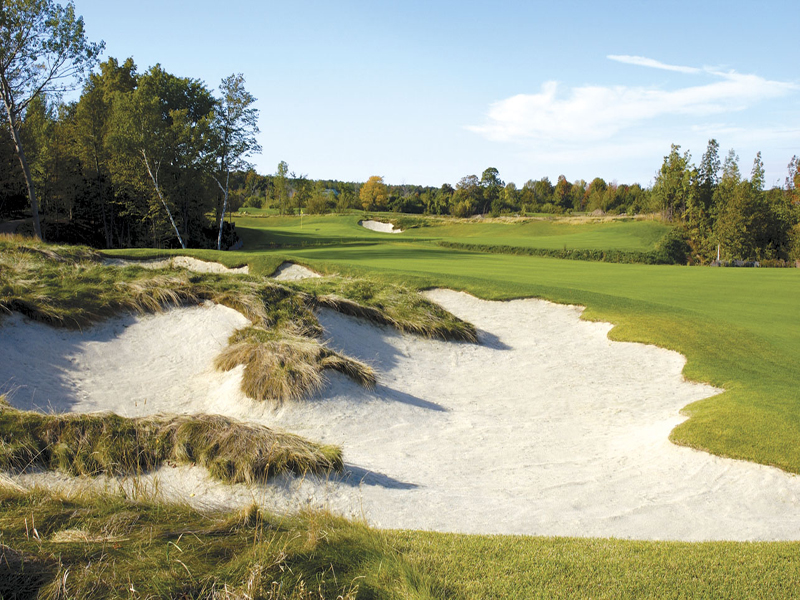
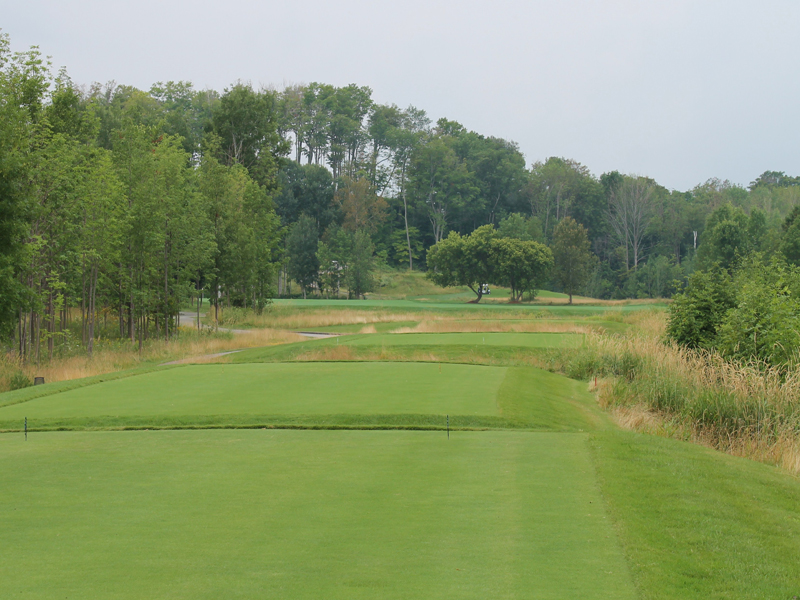
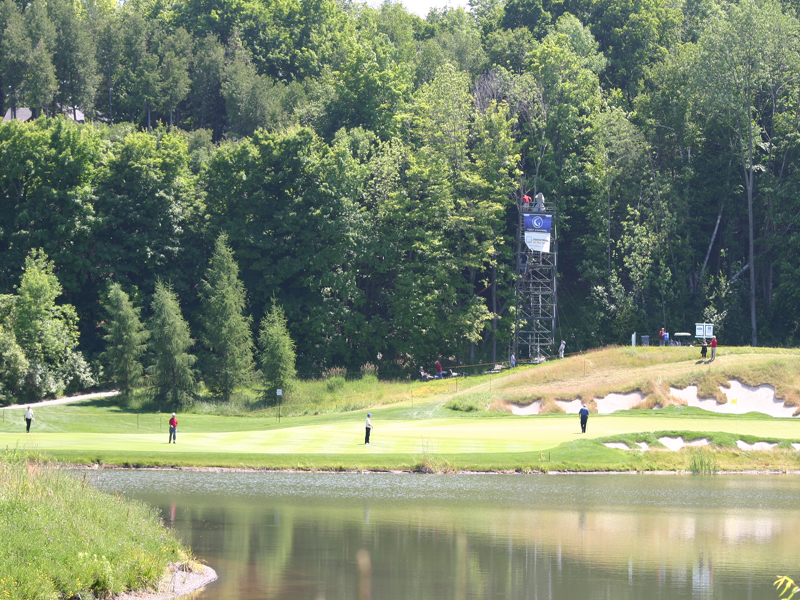
The opening hole is a solid par four, dog leg left, with a 60 deep ravine running down the entire left side from tee to green. From the tee there is a large fairway bunker guarding the landing area on the right side of the fairway.
The first hole is always a great opening challenge, and features one of the smallest greens on the course. The approach shot to the long, narrow green is more favourable from the right side of the fairway, as the approach from the left near the ravine brings the greenside bunker to the left into play. Simply a great opening hole!
- Yardage : Cobalt Tee 453
- Yardage : Gold Tee 433
- Yardage : Silver Tee 402
- Yardage : Copper Tee 360
- Yardage : Pewter Tee 337

- Men's Handicap : 5
- Ladies' Handicap : 5
Course Summary |
||
| Tees | Mens Rating | Ladies Rating |
|---|---|---|
| Cobalt Tees | 74.5/138 | - |
| Gold Tees | 72.4/135 | - |
| Silver Tees | 70.3/129 | 76.9/147 |
| Copper Tees | 67.4/126 | 72.7/140 |
| Pewter Tees | 65.0/118 | 69.5/128 |
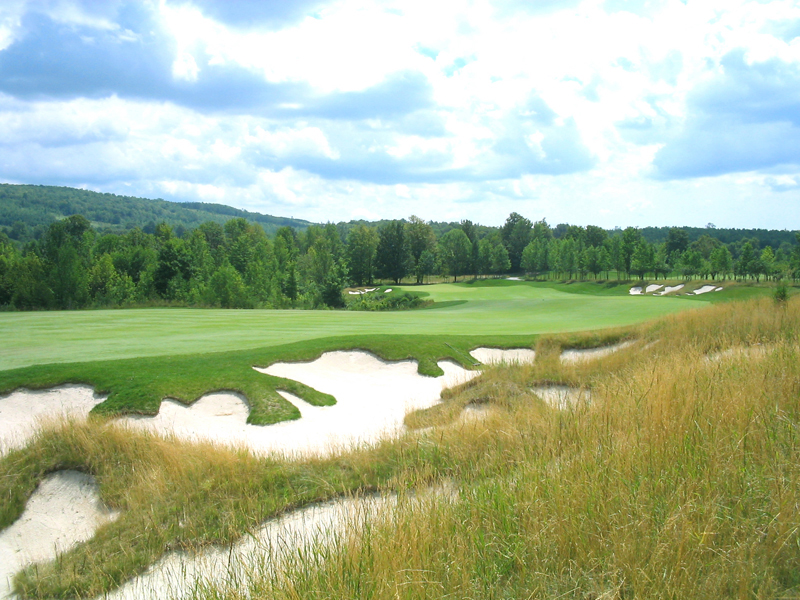
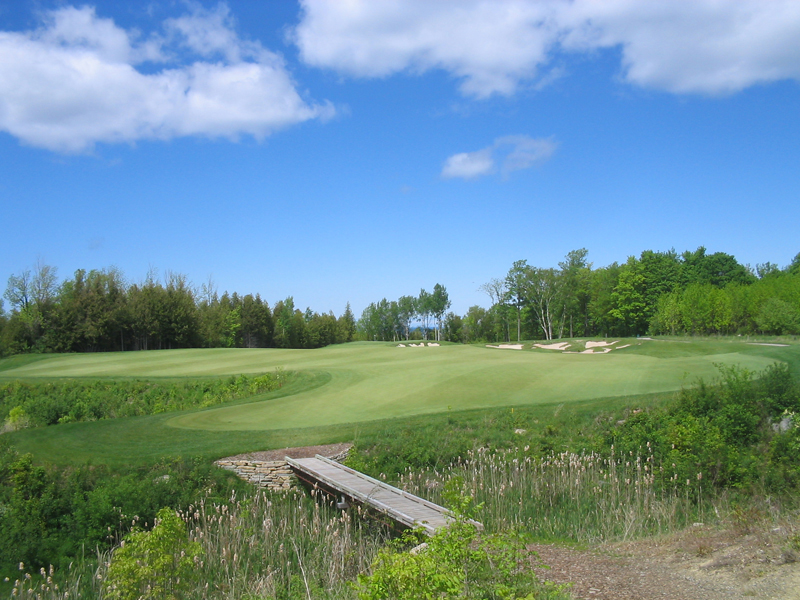
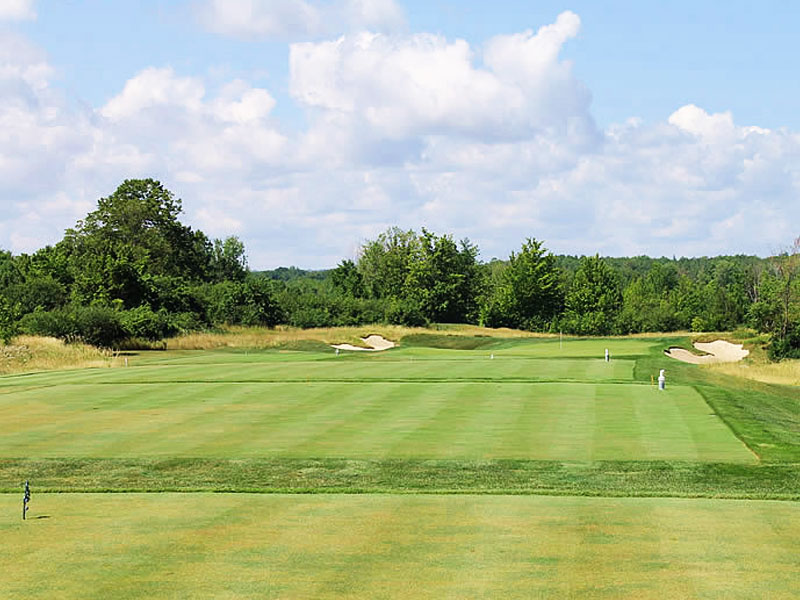
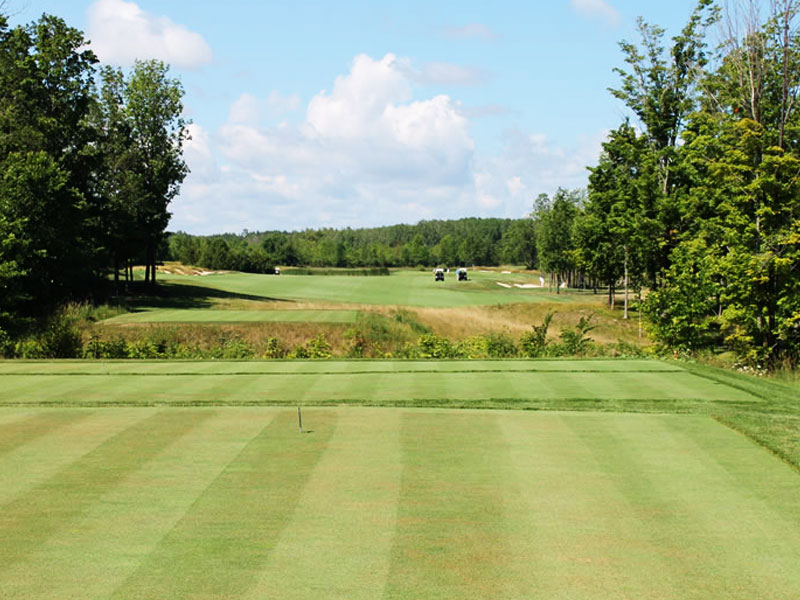
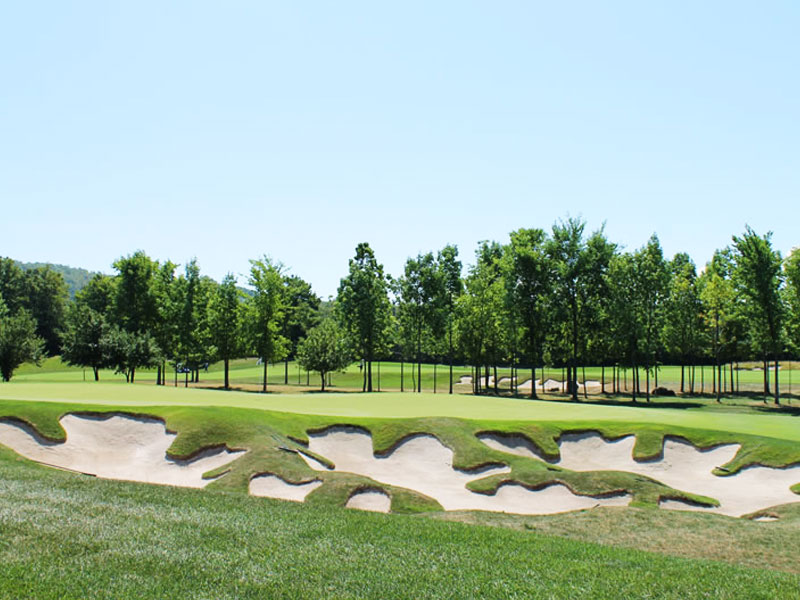
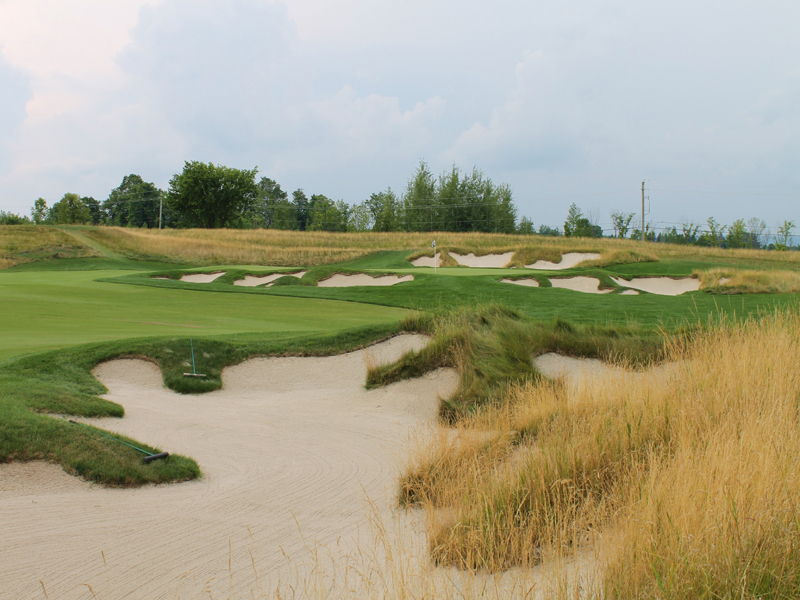
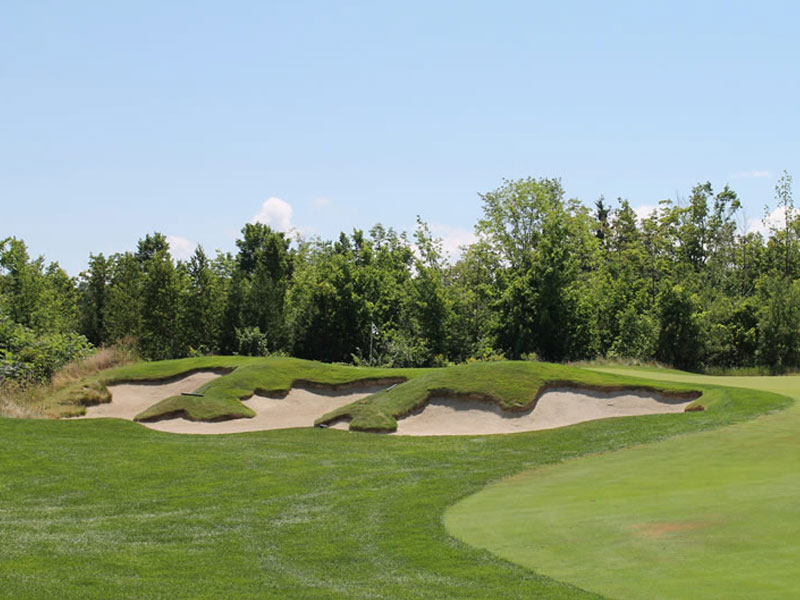
2nd Hole – Par 4
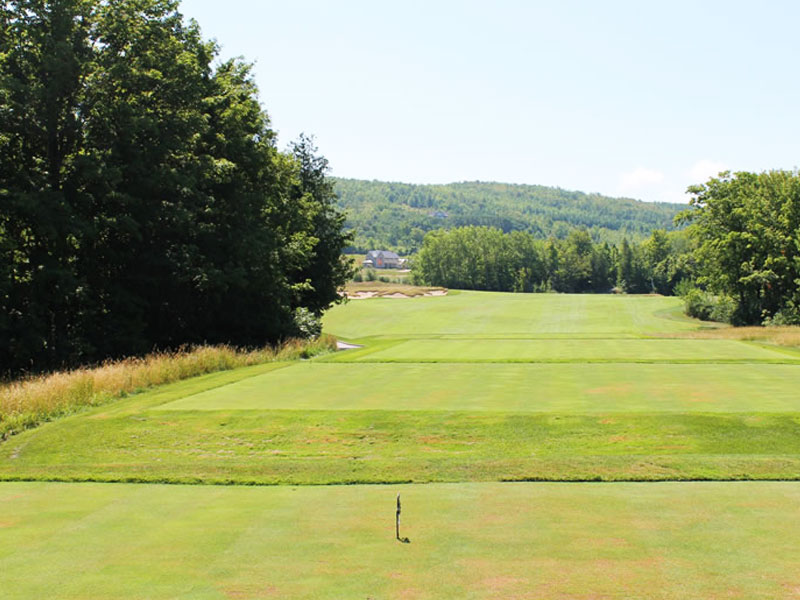
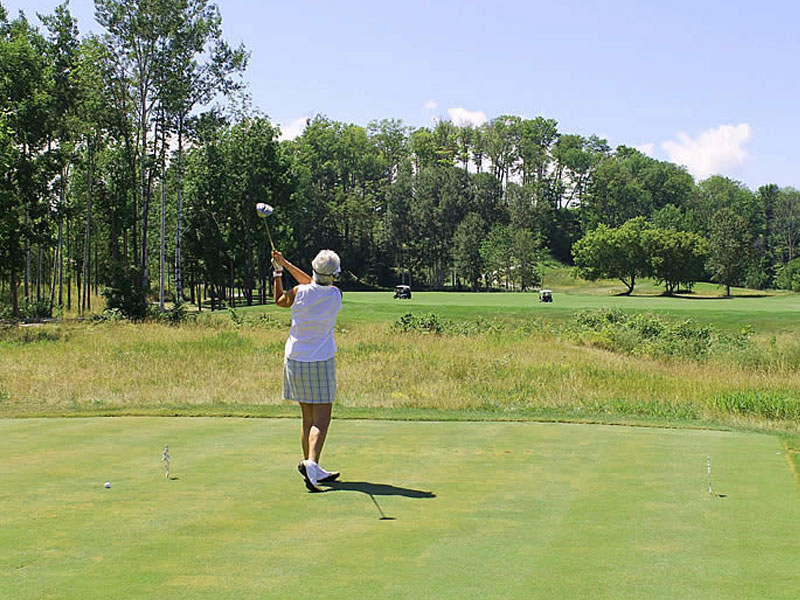
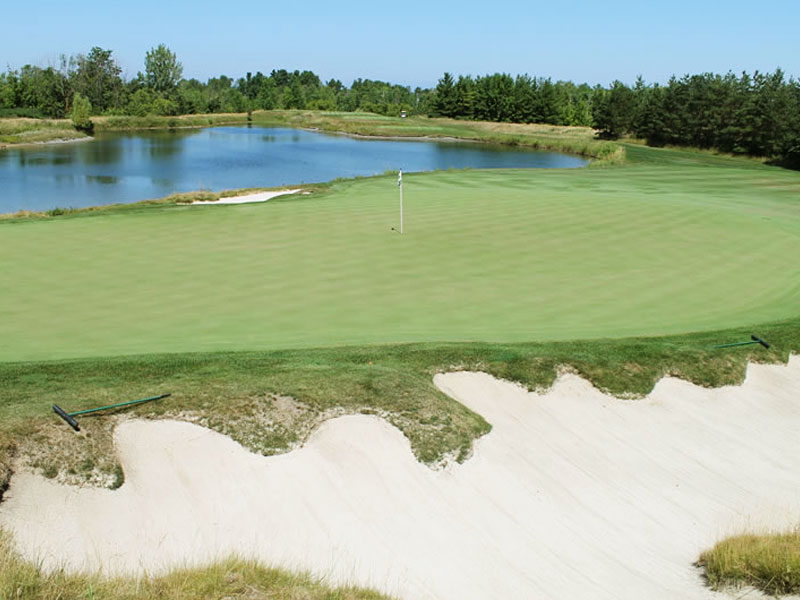
This hole epitomizes the design of the golf course as a "second shot" golf course. With a wide landing area, this relatively short par four allows you to potentially hit a selection of clubs off the tee. The tee shot has a forced carry over a deep ravine running diagonally from the golfers right to left and continuing down the entire left side of the fairway and behind the green.
Without question, the preferred angle of approach is from the left side of the fairway, and to get there requires the greatest risk off the tee. The approach shot from the right side of the fairway is more challenging because the hole is protected by a large and deep bunker in the front right of the green.
A tee shot to the left centre of the fairway puts you in great position to see the pin and think about getting it close. This is a clever par four that makes you think about your strategy from tee to green.
- Yardage : Cobalt Tee 377
- Yardage : Gold Tee 348
- Yardage : Silver Tee 291
- Yardage : Copper Tee 257
- Yardage : Pewter Tee 267
- Men's Handicap : 13
- Ladies' Handicap : 11
Course Summary |
||
| Tees | Mens Rating | Ladies Rating |
|---|---|---|
| Cobalt Tees | 74.5/138 | - |
| Gold Tees | 72.4/135 | - |
| Silver Tees | 70.3/129 | 76.9/147 |
| Copper Tees | 67.4/126 | 72.7/140 |
| Pewter Tees | 65.0/118 | 69.5/128 |
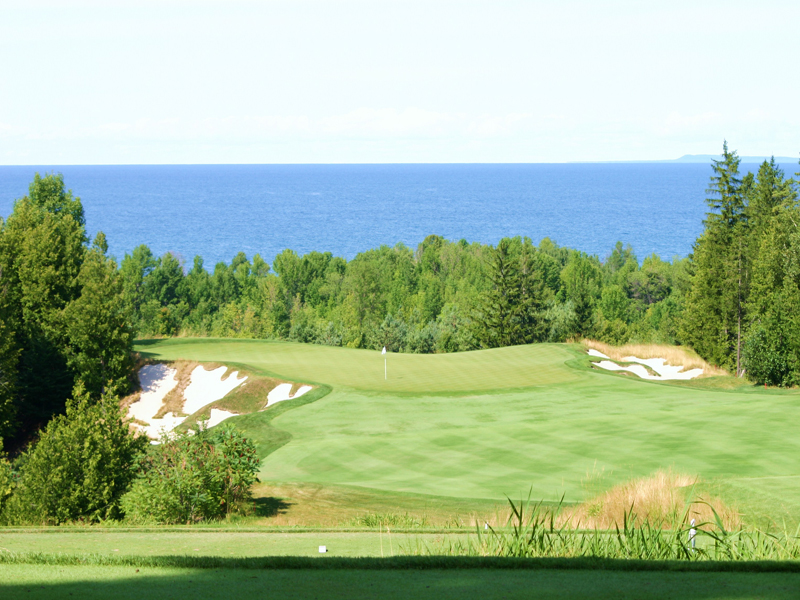
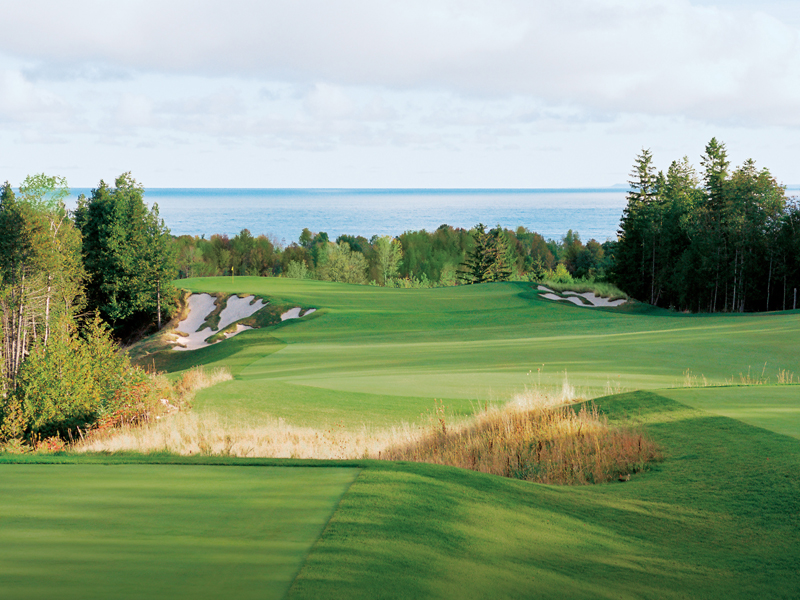
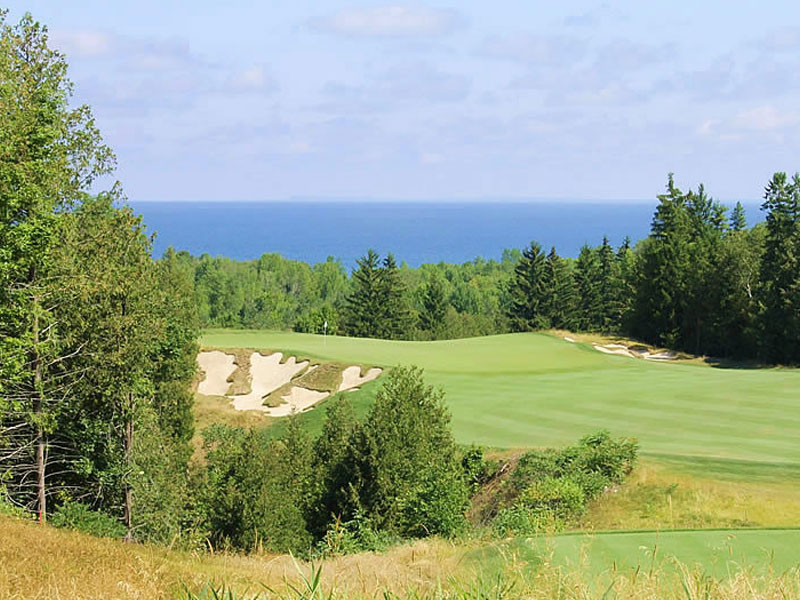
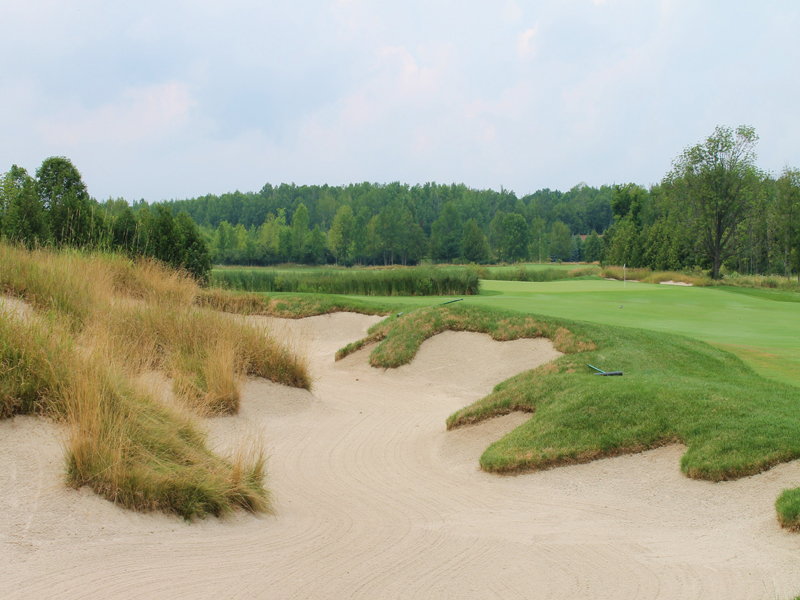
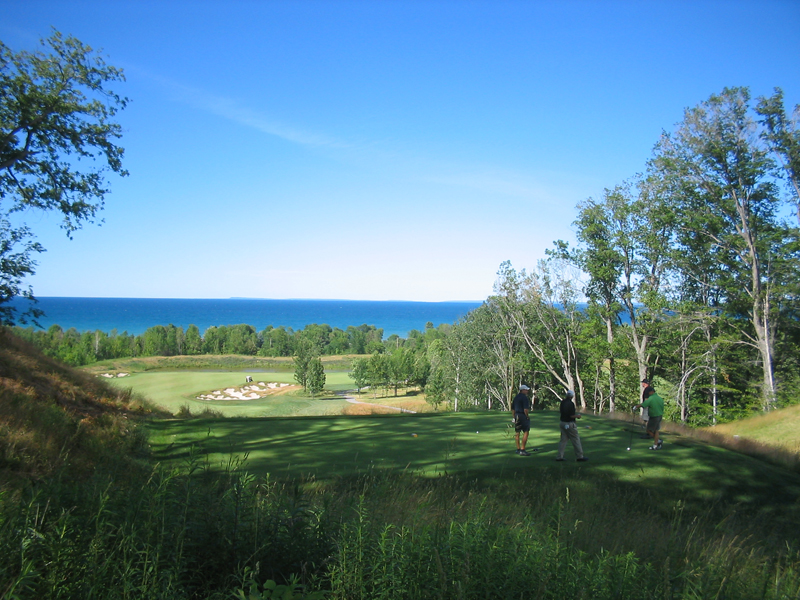
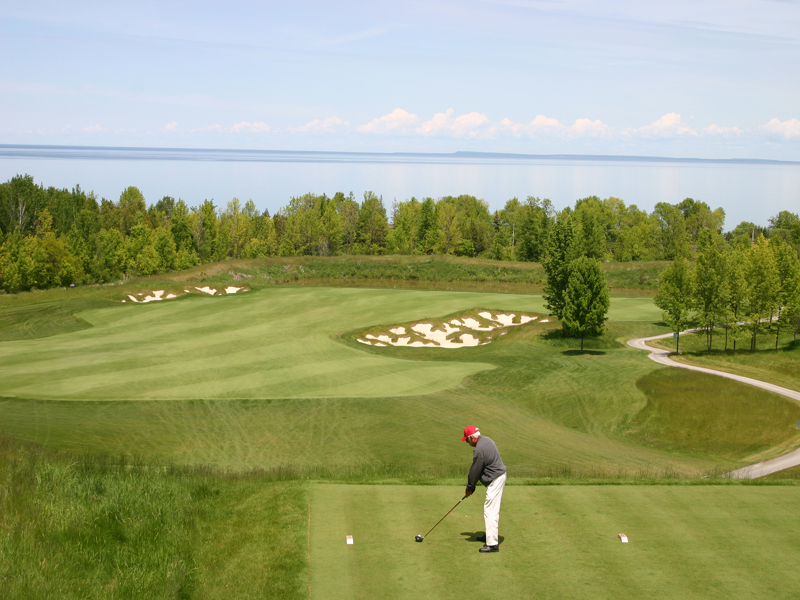
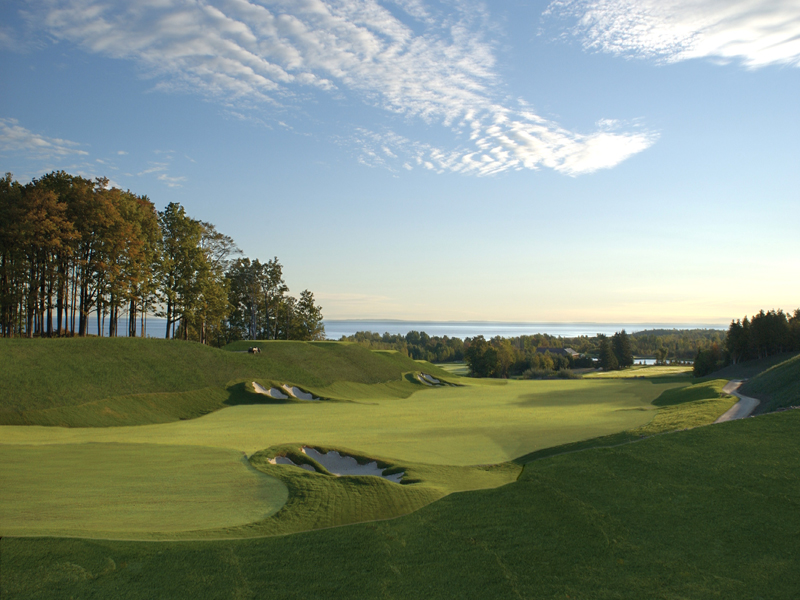
3rd Hole – Par 3
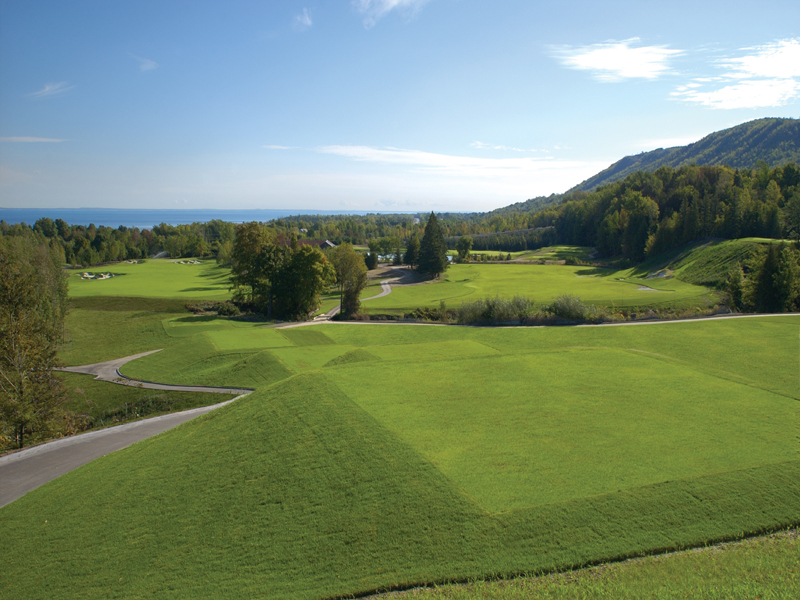
All one can really say is WOW! This par three strategically preserved an old gravel quarry now flanked by trees on both sides, with the green positioned on a bluff falling off on three sides. The spectacular view out and across Georgian Bay rivals anything the golfing world has to offer. The drop in elevation, the direction of the wind and the greenside bunkers, including the deep left side bunker from which you are unable to see the top of the flag, all make your club selection the key for success. A pin in the back left catchers mitt of the green is the most daunting to reach, and a tee shot to the center of the green is always a great play. This is by far one of the most picturesque golf holes in the country.
- Yardage : Cobalt Tee 194
- Yardage : Gold Tee 205
- Yardage : Silver Tee 179
- Yardage : Copper Tee 150
- Yardage : Pewter Tee 134
- Men's Handicap : 15
- Ladies' Handicap : 17
Course Summary |
||
| Tees | Mens Rating | Ladies Rating |
|---|---|---|
| Cobalt Tees | 74.5/138 | - |
| Gold Tees | 72.4/135 | - |
| Silver Tees | 70.3/129 | 76.9/147 |
| Copper Tees | 67.4/126 | 72.7/140 |
| Pewter Tees | 65.0/118 | 69.5/128 |
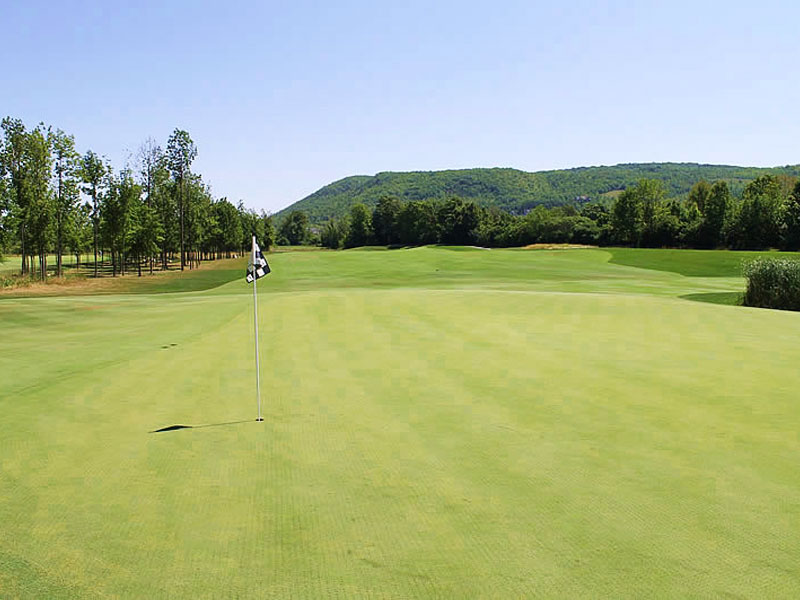
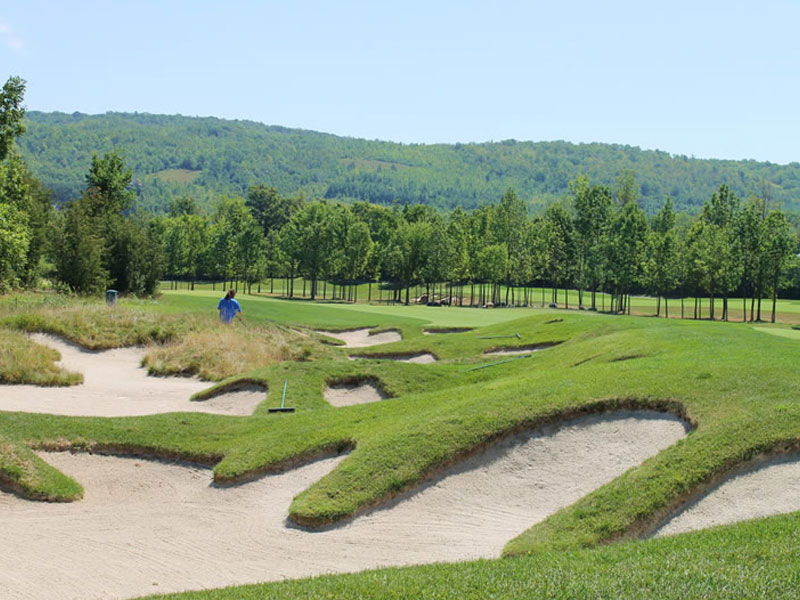
4th Hole – Par 4
This dog leg right par four has a deep ravine on the right running the length of the tee shot which then cuts in between the generous landing area and the green, while continuing around to left side of the green. You may be tempted to risk a right centre tee shot adjacent to the ravine to reduce the approach shot by as many as three clubs.
The approach shot over the ravine usually requires a half club extra to ensure your ball stays up and on the false front of the green. It is all about your strategy off the tee for your second shot that defines this challenging par four.
- Yardage : Cobalt Tee 418
- Yardage : Gold Tee 397
- Yardage : Silver Tee374
- Yardage : Copper Tee 350
- Yardage : Pewter Tee 331
- Men's Handicap : 3
- Ladies' Handicap : 3
Course Summary |
||
| Tees | Mens Rating | Ladies Rating |
|---|---|---|
| Cobalt Tees | 74.5/138 | - |
| Gold Tees | 72.4/135 | - |
| Silver Tees | 70.3/129 | 76.9/147 |
| Copper Tees | 67.4/126 | 72.7/140 |
| Pewter Tees | 65.0/118 | 69.5/128 |
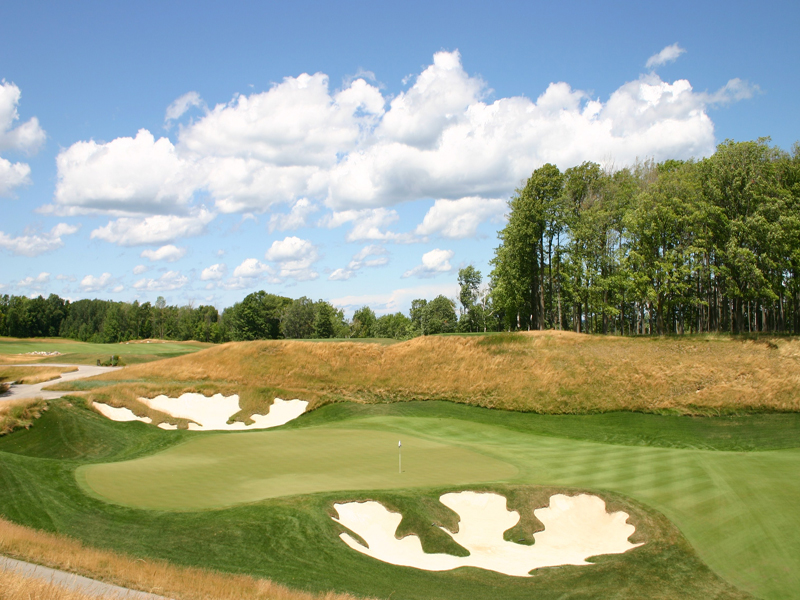
5th Hole – Par 3
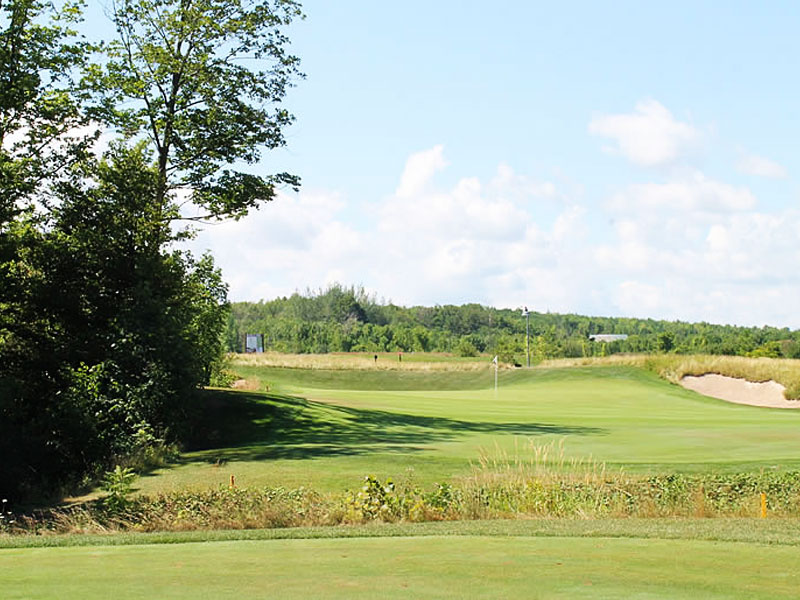
This is the longest par three on the course, with the design characteristics of the green complex reflecting the challenges of an otherwise straight forward hole. The green is set at an angle to the tee and it is easy to come up short right in the catcher´s mitt or run all the way through to the bunkers on the back left or back right. The variety of pin placements on this undulating green and the wind of the day provide for a new strategy every time you tee it up.
- Yardage : Cobalt Tee 226
- Yardage : Gold Tee 202
- Yardage : Silver Tee 178
- Yardage : Copper Tee 149
- Yardage : Pewter Tee 126
- Men's Handicap : 17
- Ladies' Handicap : 15
Course Summary |
||
| Tees | Mens Rating | Ladies Rating |
|---|---|---|
| Cobalt Tees | 74.5/138 | - |
| Gold Tees | 72.4/135 | - |
| Silver Tees | 70.3/129 | 76.9/147 |
| Copper Tees | 67.4/126 | 72.7/140 |
| Pewter Tees | 65.0/118 | 69.5/128 |
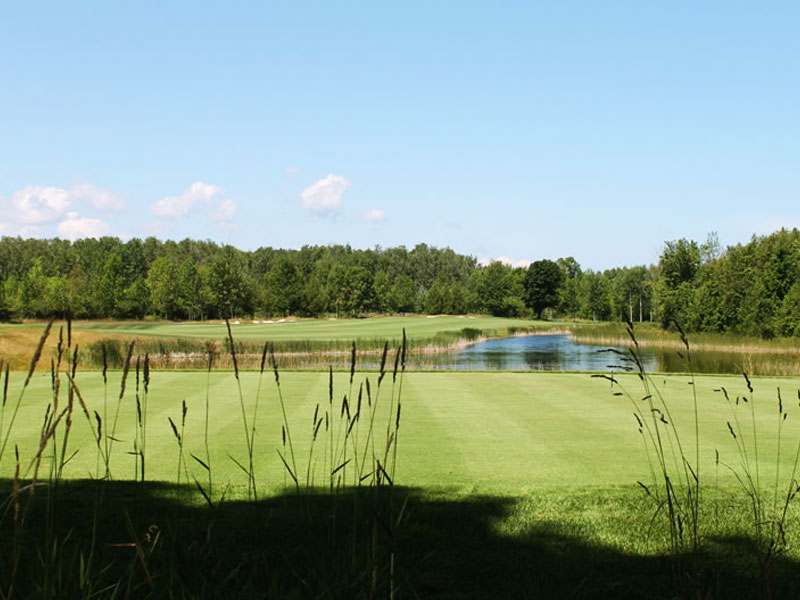
6th Hole – Par 4
When you walk onto the tee at the sixth hole, your first impression is this is the first of the par fives. This straight away par four presents an illusion of length because behind the green in the distance is the pond on seven followed by the seventh fairway. This lack of context behind the green gives you the impression of distance, adding further to the psychology of this strong par four. The approach shot leaves you facing a pond to the left and back of the green, and a large swale to catch any ball on the right edge of the green. Middle of the green and a two putt par is always a good score on this hole.
- Yardage : Cobalt Tee 440
- Yardage : Gold Tee 416
- Yardage : Silver Tee 404
- Yardage : Copper Tee 350
- Yardage : Pewter Tee 294
- Men's Handicap : 9
- Ladies' Handicap : 13
Course Summary |
||
| Tees | Mens Rating | Ladies Rating |
|---|---|---|
| Cobalt Tees | 74.5/138 | - |
| Gold Tees | 72.4/135 | - |
| Silver Tees | 70.3/129 | 76.9/147 |
| Copper Tees | 67.4/126 | 72.7/140 |
| Pewter Tees | 65.0/118 | 69.5/128 |
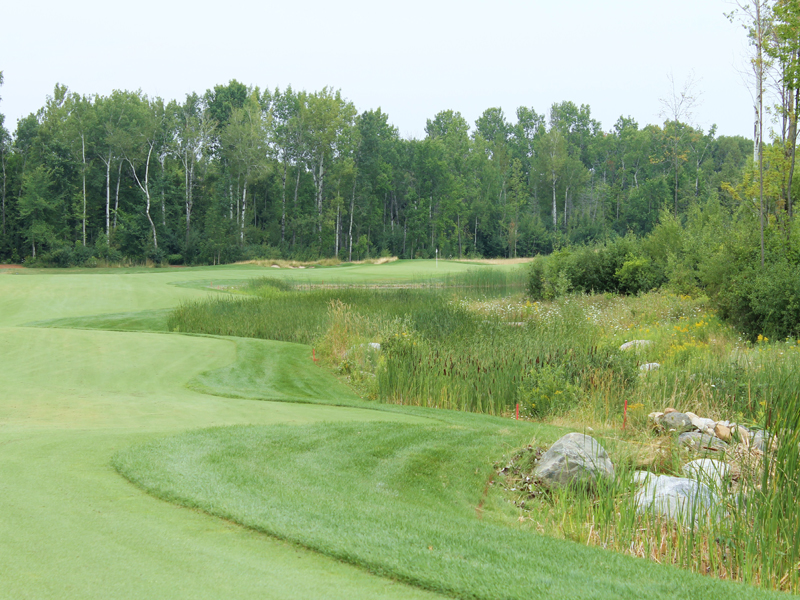
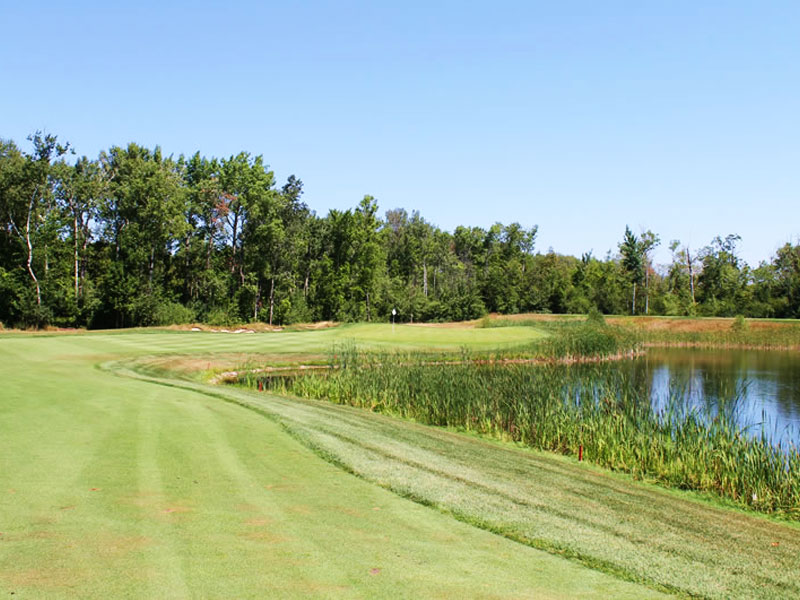
7th Hole – Par 5
This dog leg right is the first and only par five on the front side and is a classic hole of heroic design. For those who can carry their tee shot over the furthest corner of the pond to the right, you will have a great chance of catching the down slope and further shortening the hole. And the longer the carry off the tee, the greater the reward for those with the potential to get home in two. The green is oriented to favour approach shots from the water side and is protected by a bunker on the left and water on the right.
This hole invites aggressive play and will yield its share of low scores, but being overly aggressive can quickly result in bogey or more. It is a heroic hole of grand proportions with risk reward always on your mind, but sometimes conservative play will be the wise decision.
- Yardage : Cobalt Tee 575
- Yardage : Gold Tee 542
- Yardage : Silver Tee 515
- Yardage : Copper Tee 487
- Yardage : Pewter Tee 458
- Men's Handicap : 1
- Ladies' Handicap : 1
Course Summary |
||
| Tees | Mens Rating | Ladies Rating |
|---|---|---|
| Cobalt Tees | 74.5/138 | - |
| Gold Tees | 72.4/135 | - |
| Silver Tees | 70.3/129 | 76.9/147 |
| Copper Tees | 67.4/126 | 72.7/140 |
| Pewter Tees | 65.0/118 | 69.5/128 |
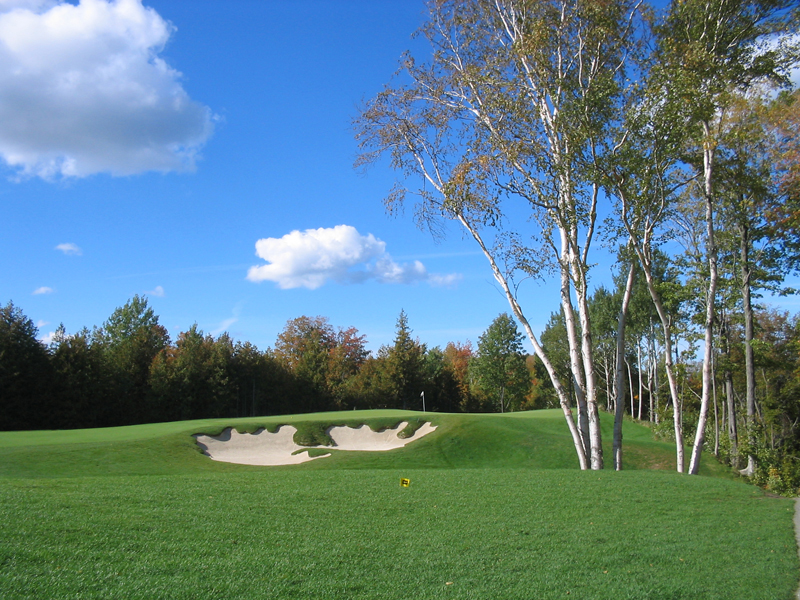
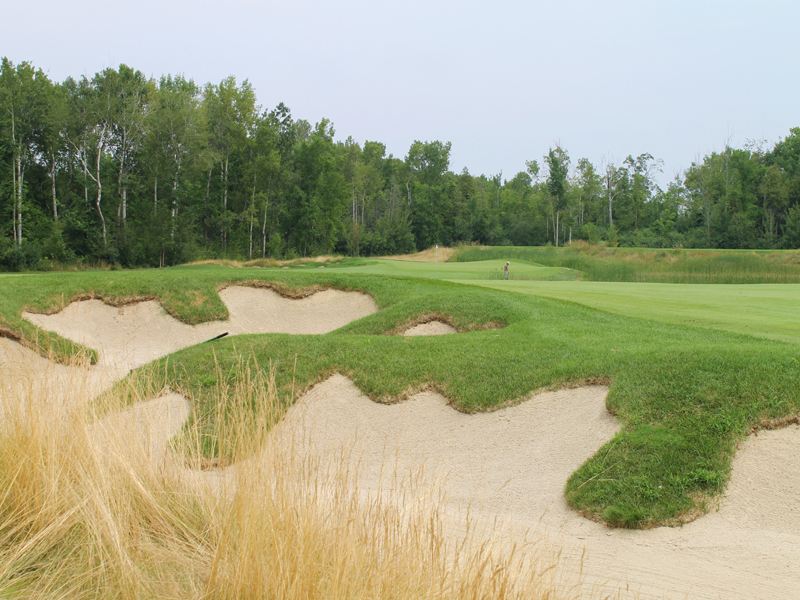
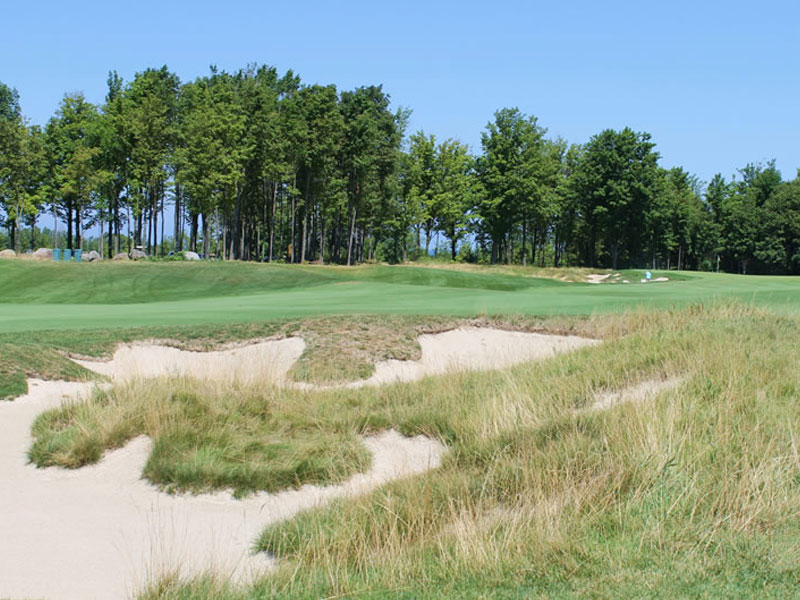
8th Hole – Par 4
This is a wonderful par four dog leg left with a strong risk reward strategy off the tee. Playing to a point equidistant between the creek on the right and the diagonal bunker complex on the left will leave a long iron into the green. The temptation will be to cut the left corner and cut off as many of the cross bunkers as possible. This undoubtedly will leave a shorter approach shot, but also leaves a much more difficult angle over a deep and twisting bunker complex guarding the front left of the green. The backdrop of the Niagara Escarpment frames this hole as one of the courses most beautiful and colourful views for golfing in the fall.
- Yardage : Cobalt Tee 452
- Yardage : Gold Tee 434
- Yardage : Silver Tee 413
- Yardage : Copper Tee 386
- Yardage : Pewter Tee 366
- Men's Handicap : 7
- Ladies' Handicap : 7
Course Summary |
||
| Tees | Mens Rating | Ladies Rating |
|---|---|---|
| Cobalt Tees | 74.5/138 | - |
| Gold Tees | 72.4/135 | - |
| Silver Tees | 70.3/129 | 76.9/147 |
| Copper Tees | 67.4/126 | 72.7/140 |
| Pewter Tees | 65.0/118 | 69.5/128 |
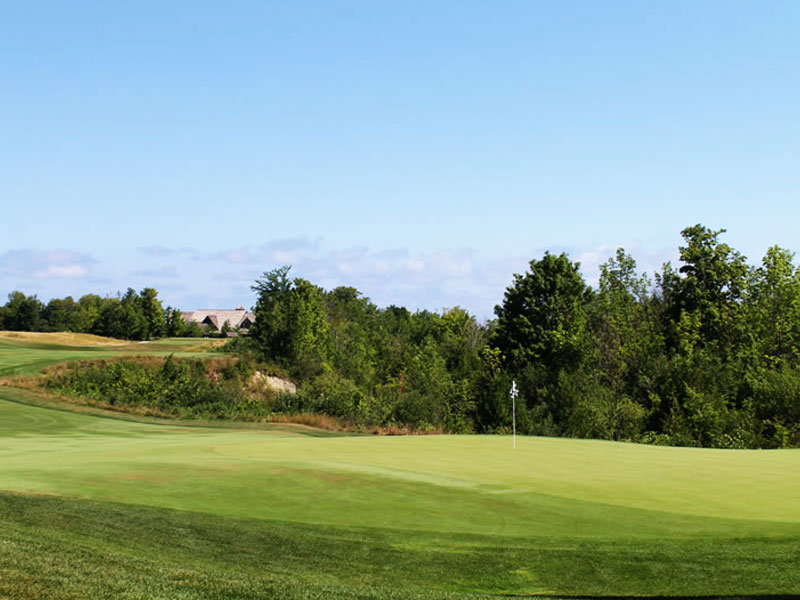
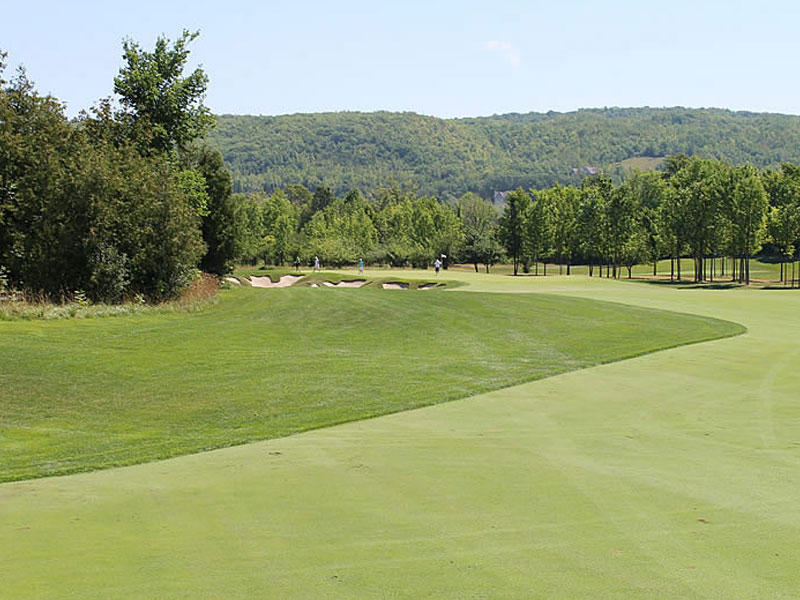
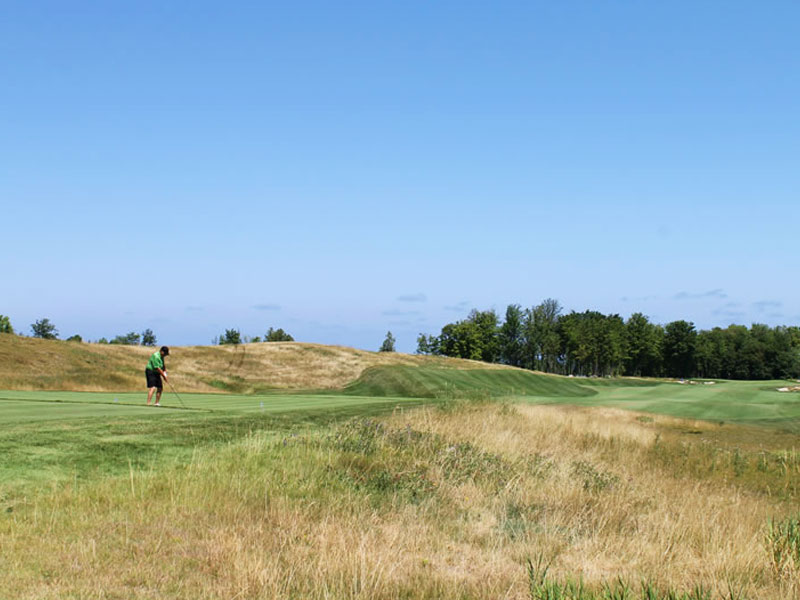
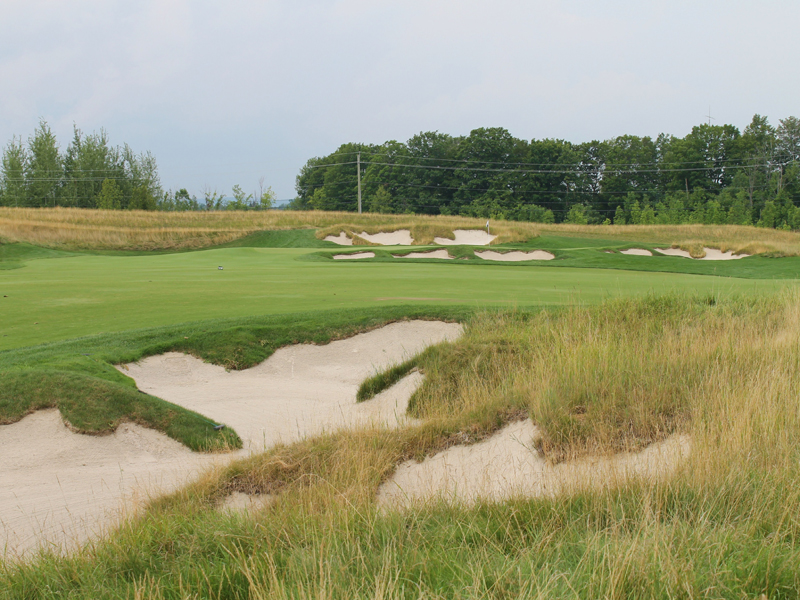
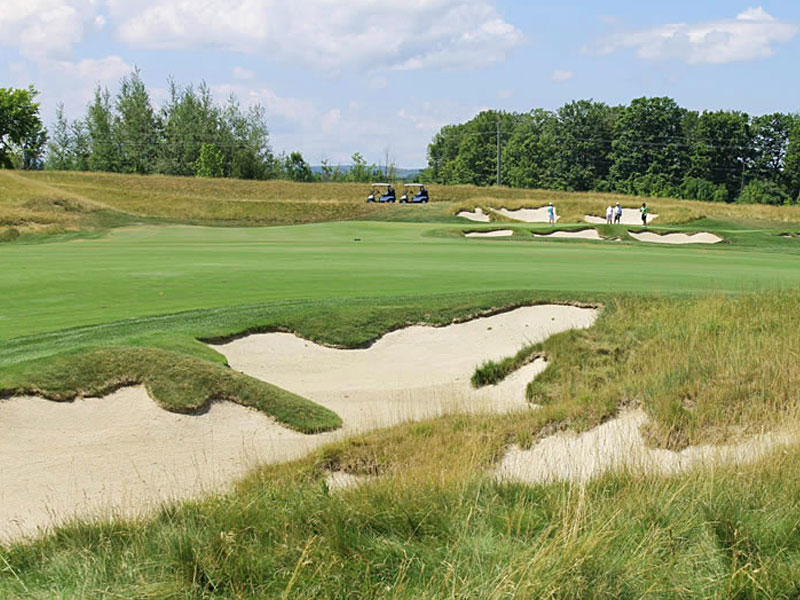
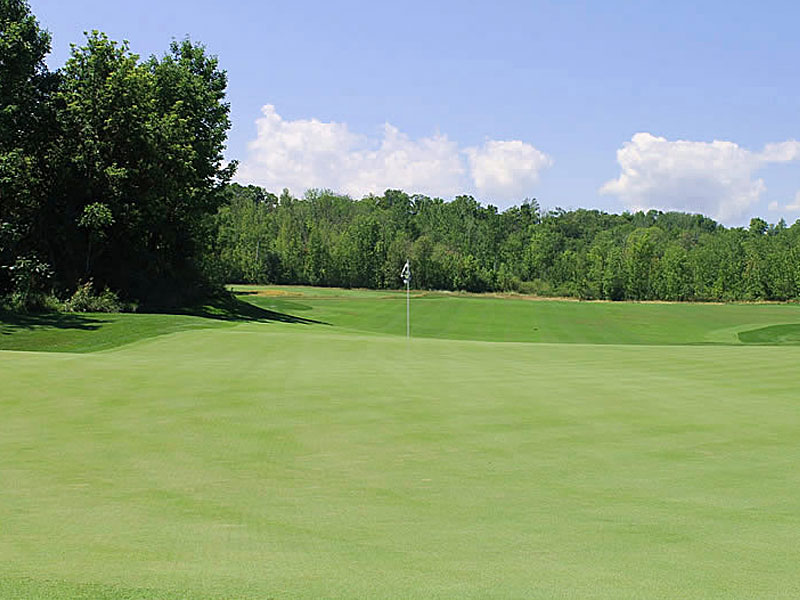
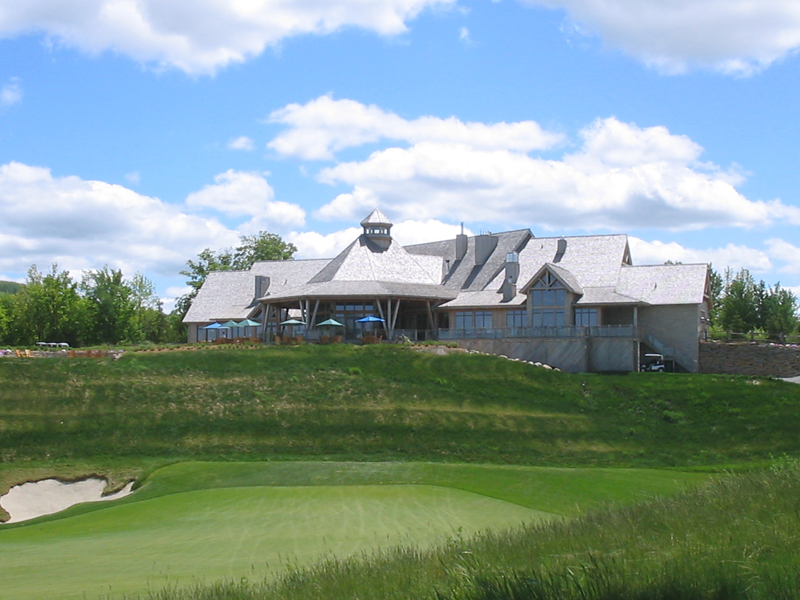
9th Hole – Par 4
The home hole on the front nine is a straight away par four framed by two ridges of waving fescue on either side. This hole should be fairly straight forward provided you avoid the fairway bunker on the right side. The green is angled from front right to back left, inviting a tee shot to be placed near the lone fairway bunker. From there it is a short or mid iron to an open green on the front right guarded by bunkers on both sides. Be sure to make note of any wind and the slightly elevated green when making your club selection.
- Yardage : Cobalt Tee 402
- Yardage : Gold Tee 381
- Yardage : Silver Tee 357
- Yardage : Copper Tee 332
- Yardage : Pewter Tee 312
- Men's Handicap : 11
- Ladies' Handicap : 9
Course Summary |
||
| Tees | Mens Rating | Ladies Rating |
|---|---|---|
| Cobalt Tees | 74.5/138 | - |
| Gold Tees | 72.4/135 | - |
| Silver Tees | 70.3/129 | 76.9/147 |
| Copper Tees | 67.4/126 | 72.7/140 |
| Pewter Tees | 65.0/118 | 69.5/128 |
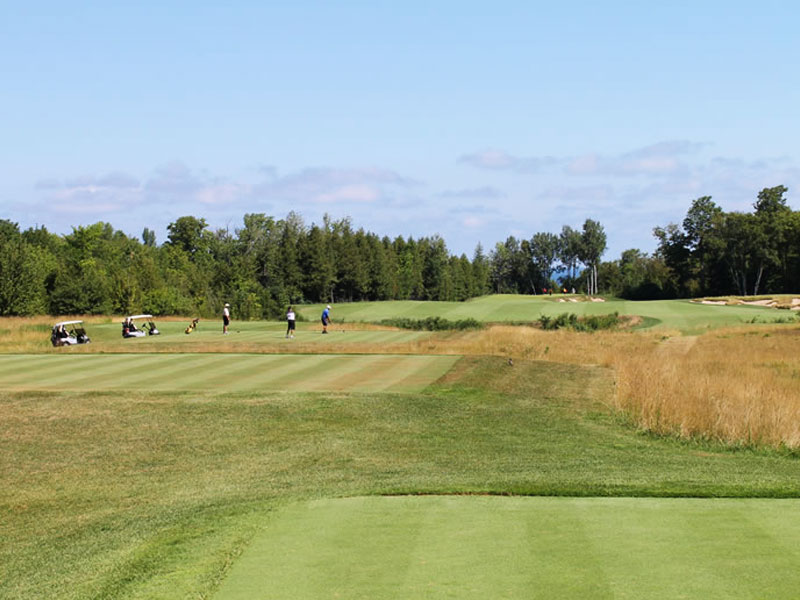
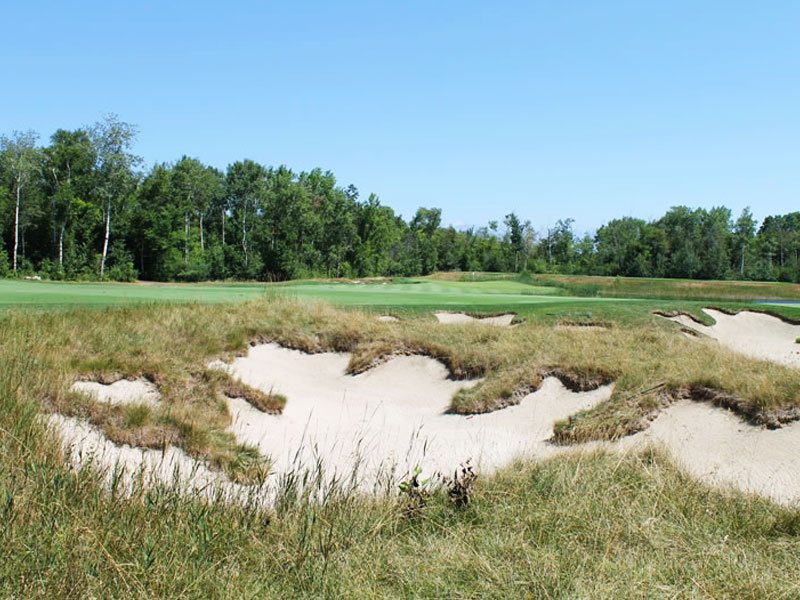
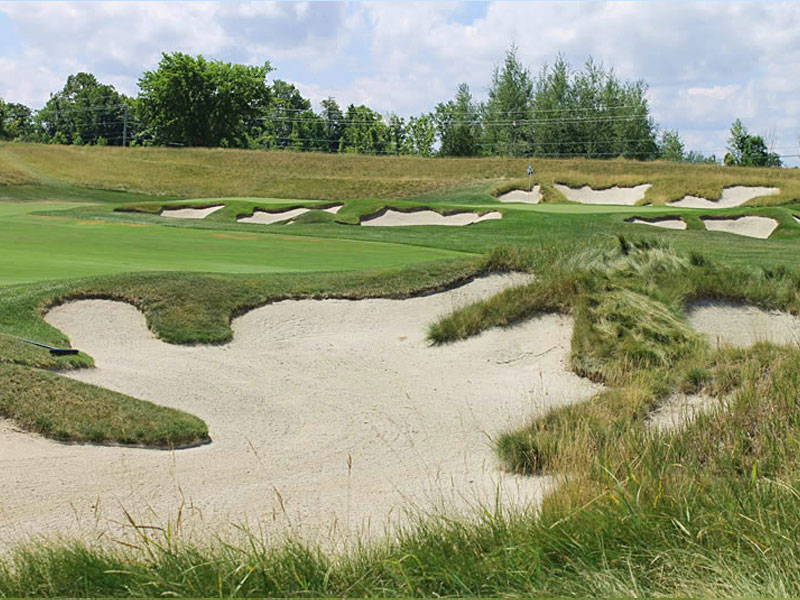
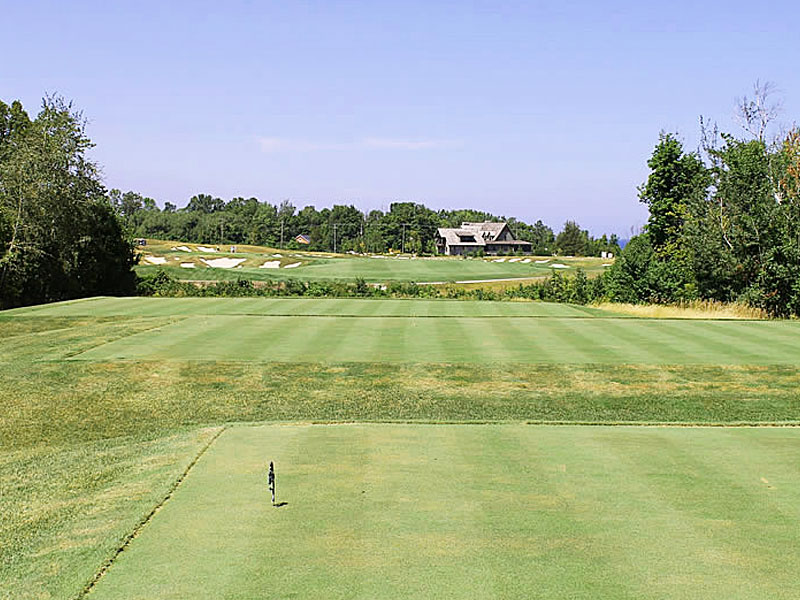
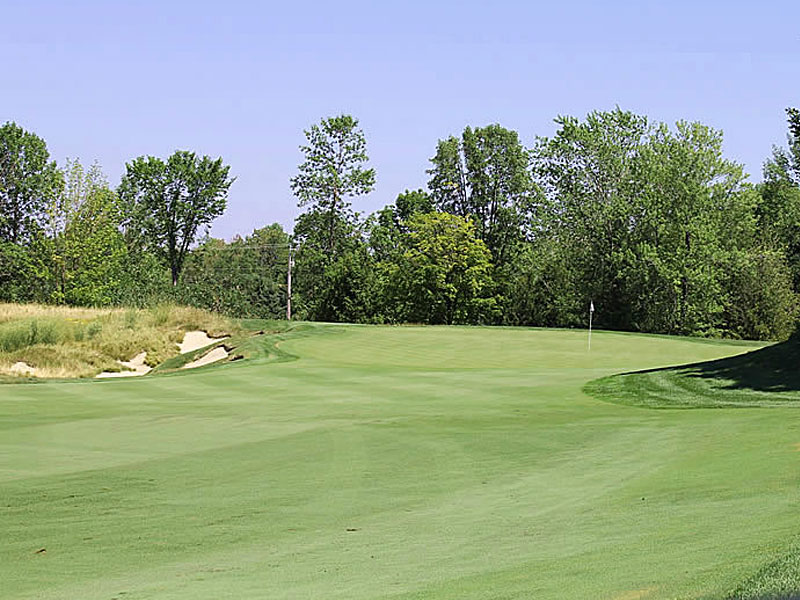
10th Hole – Par 4
The back nine starts with a long par four with a carry over a deep fescue bowl to a generous fairway, guarded by fairway bunkers on both the left and right sides. Dont let this hole lull you into a sense of complacency because of the generous fairway. You want to focus on the preferred side of the fairway based on the pin placement of the day. The front right of the green is open but the greenside bunker to and swale to the right are ready to catch shots fading that way. A back left pin is always challenging to reach from the left side of the fairway over the left greenside bunker. The green is one of the largest greens on the golf course, making a proper club selection for your approach shot all the more important.
- Yardage : Cobalt Tee 445
- Yardage : Gold Tee 421
- Yardage : Silver Tee 388
- Yardage : Copper Tee 340
- Yardage : Pewter Tee 305
- Men's Handicap : 12
- Ladies' Handicap : 10
Course Summary |
||
| Tees | Mens Rating | Ladies Rating |
|---|---|---|
| Cobalt Tees | 74.5/138 | - |
| Gold Tees | 72.4/135 | - |
| Silver Tees | 70.3/129 | 76.9/147 |
| Copper Tees | 67.4/126 | 72.7/140 |
| Pewter Tees | 65.0/118 | 69.5/128 |
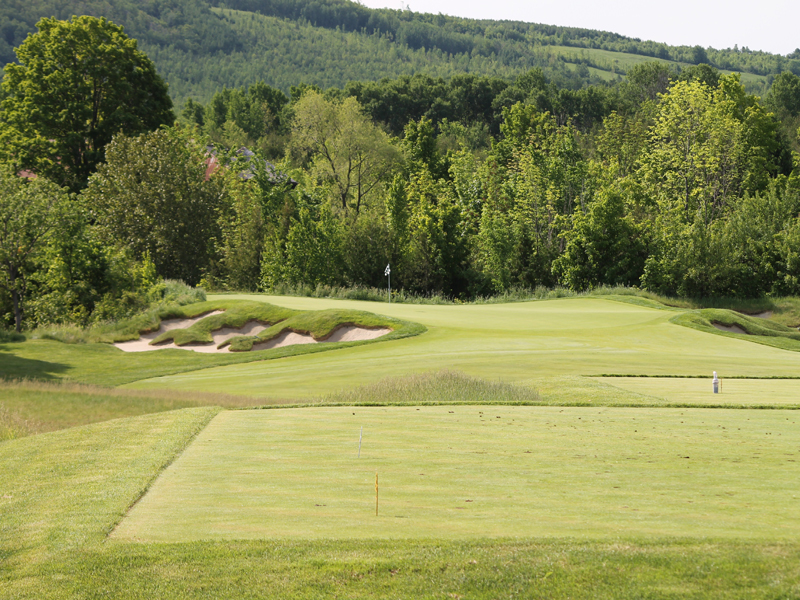
11th Hole – Par 4
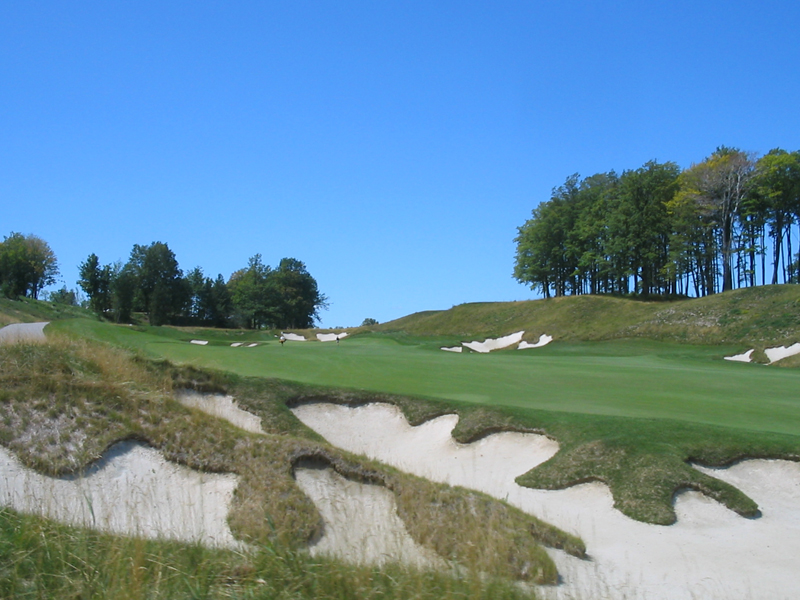
This is a very intriguing and sometimes drivable par four, affording golfers many options off the tee. On a straight line from the back tees, it is 300 yards to the middle of the green and less from each successive tee. Most golfers have a tendency to go for it with a driver in hand, but the risks one must take to get there are numerous. The carry over the steep walls of sand in the huge fairway bunker is daunting. More conservative play off the tee to the main part of the fairway to the right leaves you with a short iron or wedge to a narrow green with bunkers both in front and behind.
This crafty par four will yield its share of birdies and maybe even an eagle or two. Select your strategy and then be confident in your execution so you dont walk away with bogey or worse, wondering "how did I just do that?" This is another great hole where strategy is the key to success.
- Yardage : Cobalt Tee 335
- Yardage : Gold Tee 314
- Yardage : Silver Tee 295
- Yardage : Copper Tee 272
- Yardage : Pewter Tee 176
- Men's Handicap : 14
- Ladies' Handicap : 14
Course Summary |
||
| Tees | Mens Rating | Ladies Rating |
|---|---|---|
| Cobalt Tees | 74.5/138 | - |
| Gold Tees | 72.4/135 | - |
| Silver Tees | 70.3/129 | 76.9/147 |
| Copper Tees | 67.4/126 | 72.7/140 |
| Pewter Tees | 65.0/118 | 69.5/128 |
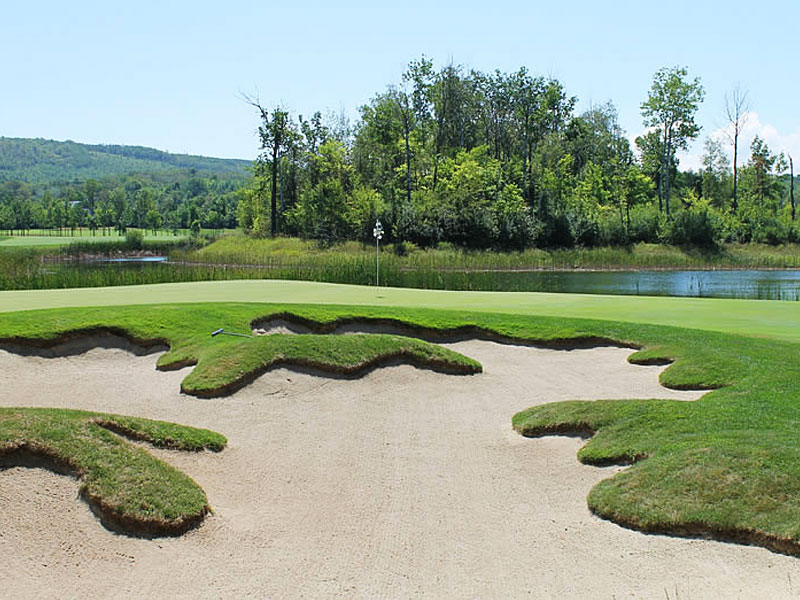
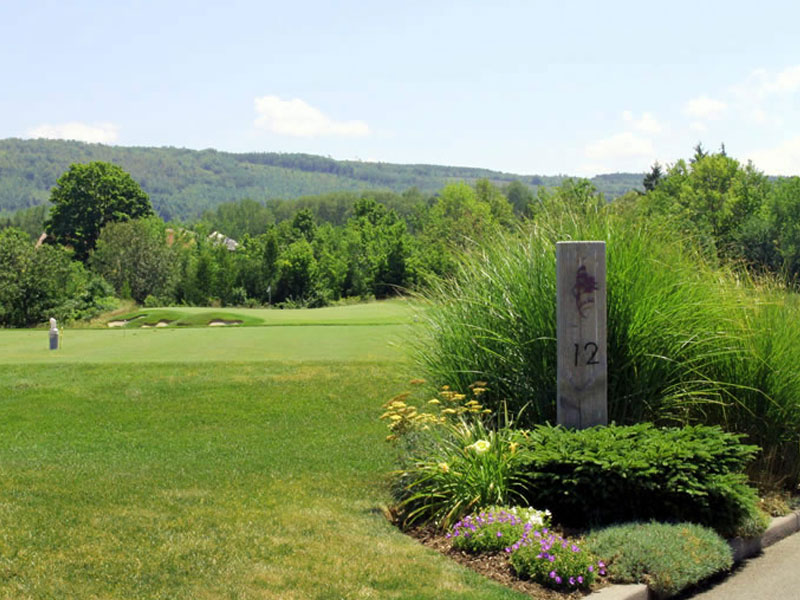
12th Hole – Par 3
This is the shortest par three on the course, but it can also be one of the most demanding if its challenges are not fully assessed. Anything hit short of the green will not bounce up and on, so club selection off the tee should be carefully considered. The green is well bunkered both on the left and right sides and there is a steep cliff off the left and back sides. Check the wind carefully before you pull the trigger, as the only margin for error is short in front of the green. A tee shot to the center of the green is always a welcome sight from the slightly elevated tee complex.
- Yardage : Cobalt Tee 176
- Yardage : Gold Tee 153
- Yardage : Silver Tee 143
- Yardage : Copper Tee 120
- Yardage : Pewter Tee 93
- Men's Handicap : 18
- Ladies' Handicap : 18
Course Summary |
||
| Tees | Mens Rating | Ladies Rating |
|---|---|---|
| Cobalt Tees | 74.5/138 | - |
| Gold Tees | 72.4/135 | - |
| Silver Tees | 70.3/129 | 76.9/147 |
| Copper Tees | 67.4/126 | 72.7/140 |
| Pewter Tees | 65.0/118 | 69.5/128 |
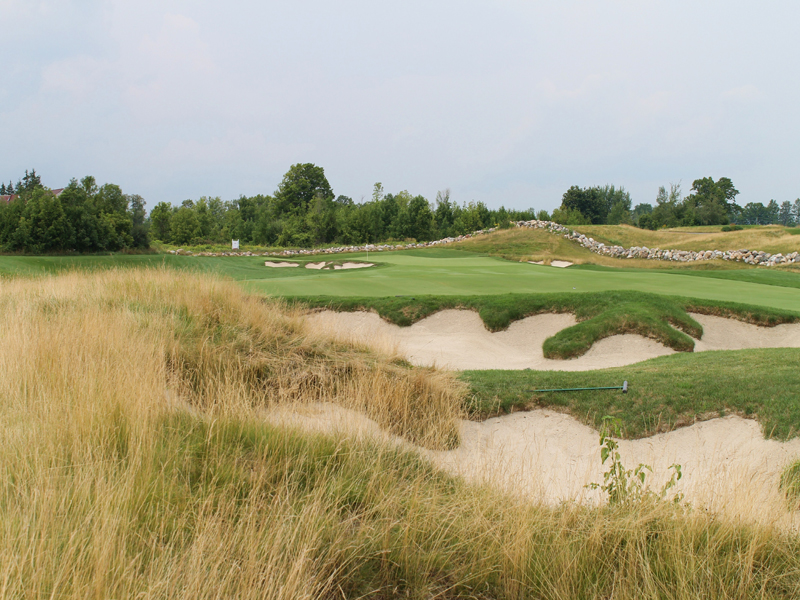
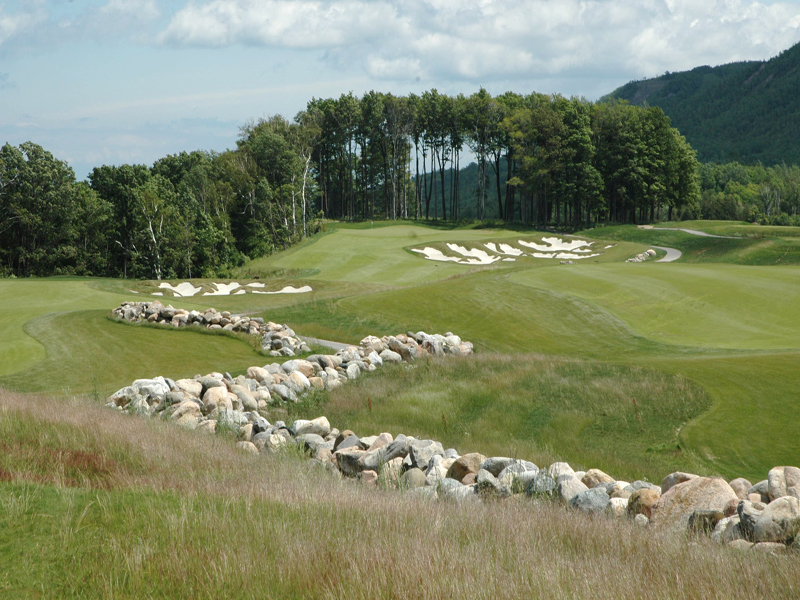
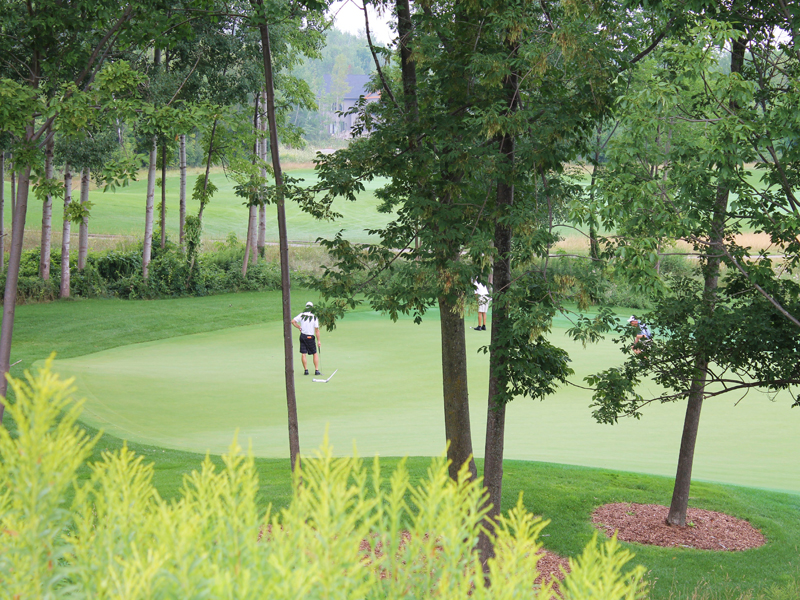
13th Hole – Par 5
Besides a reachable par four, a reachable par five is also a favourite for all golfers. The key to this par five is to play it backwards in your mind. This hole is visually stunning, with a rock wall winding its way down the right side and the Blue Mountains in the back drop. The tee shot can be played safely to the wide fairway on the left or you can risk hitting over the fairway bunker on the right and receiving a favourable forward roll down the sloping fairway. Conservative play would be to lay up with your second shot into the neck of the fairway rather than risk a second shot over the huge bunker complex protecting the entire front and right of the green.
The approach shots are all to an elevated and undulating green which measures over 10,000 square feet, with a cliff running up to and beside the entire left side of the hole. It is important to protect against the challenge of a long putt, so know your yardage for proper club selection. A par on this hole may sometimes leave you feeling you have dropped a stroke to the field, but dont let a less than perfect tee shot lead to a score you could have avoided by adjusting your strategy.
- Yardage : Cobalt Tee 510
- Yardage : Gold Tee 472
- Yardage : Silver Tee 450
- Yardage : Copper Tee 425
- Yardage : Pewter Tee 405
- Men's Handicap : 4
- Ladies' Handicap : 2
Course Summary |
||
| Tees | Mens Rating | Ladies Rating |
|---|---|---|
| Cobalt Tees | 74.5/138 | - |
| Gold Tees | 72.4/135 | - |
| Silver Tees | 70.3/129 | 76.9/147 |
| Copper Tees | 67.4/126 | 72.7/140 |
| Pewter Tees | 65.0/118 | 69.5/128 |
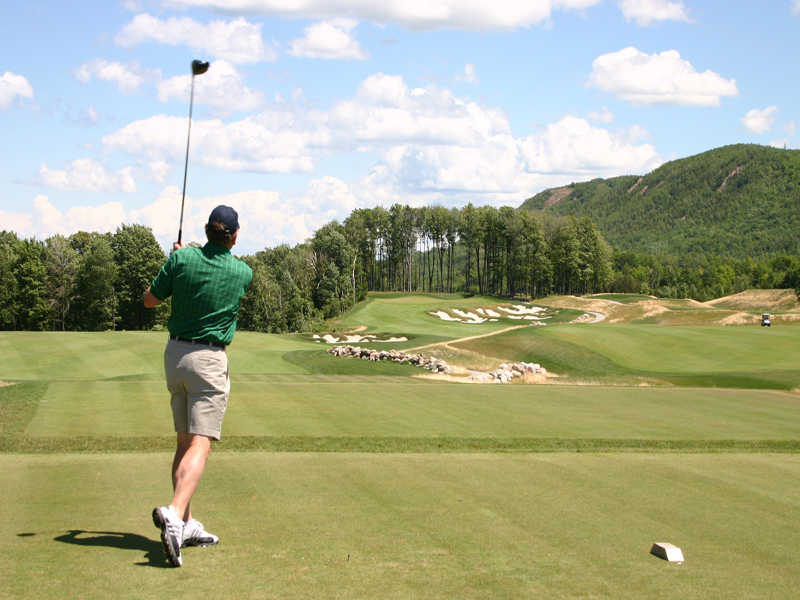
14th Hole – Par 4
The tee shot on this sharp dog leg right par four certainly competes for the most dramatic on the golf course. From the elevated tee, enjoy the spectacular views of Georgian Bay and then prepare for your tee shot to the fairway below. Pay attention to the wind off the tee if you are going to cut the right corner and avoid the fairway cross bunkers, because your ball will be in the air for a longer period of time from the elevated tee. And, an overly aggressive tee shot hit too far will flirt with the pond on the far side of the fairway. A tee shot to the wider left side of the fairway, while more conservative, will leave a much longer approach shot into a long green running from back to front, bringing the left greenside bunker and pond into play. Enjoy the views and the challenge of this beautiful par four.
- Yardage : Cobalt Tee 441
- Yardage : Gold Tee 420
- Yardage : Silver Tee 394
- Yardage : Copper Tee 345
- Yardage : Pewter Tee 323
- Men's Handicap : 8
- Ladies' Handicap : 8
Course Summary |
||
| Tees | Mens Rating | Ladies Rating |
|---|---|---|
| Cobalt Tees | 74.5/138 | - |
| Gold Tees | 72.4/135 | - |
| Silver Tees | 70.3/129 | 76.9/147 |
| Copper Tees | 67.4/126 | 72.7/140 |
| Pewter Tees | 65.0/118 | 69.5/128 |
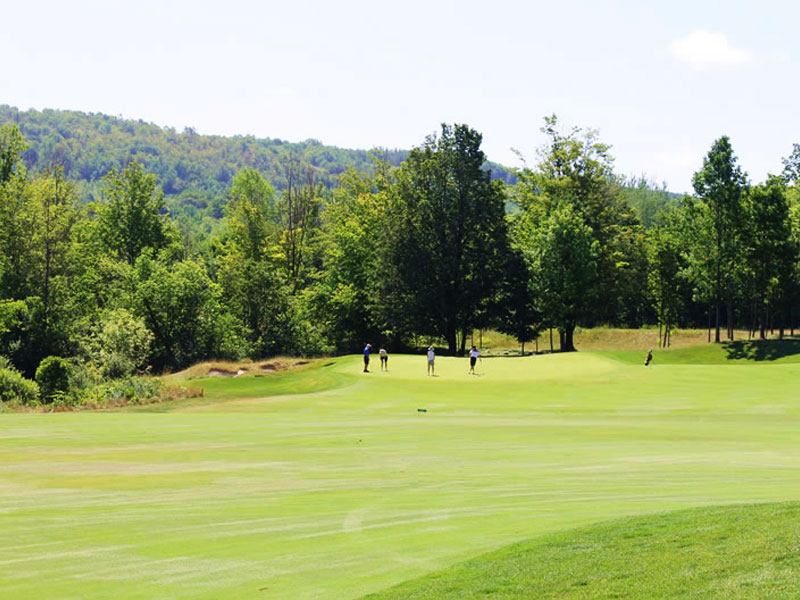
15th Hole – Par 4
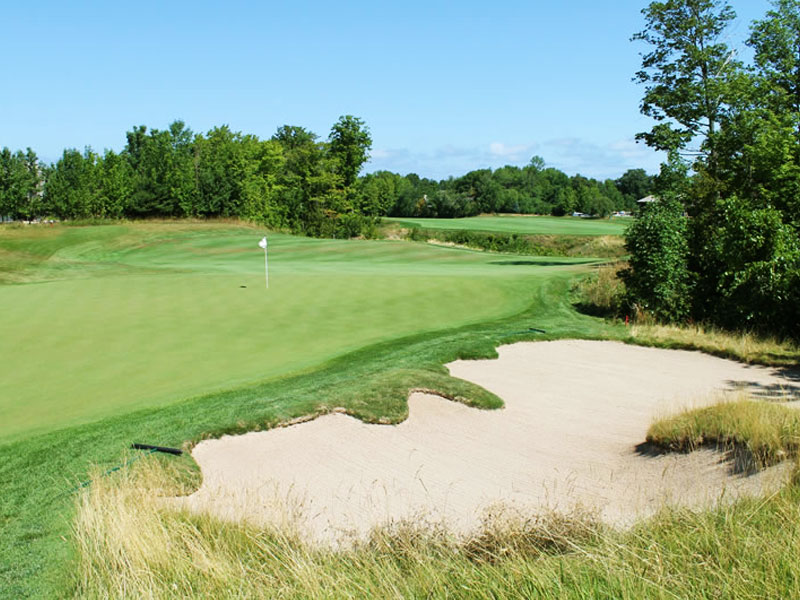
This medium length par four has a gentle sweep to the left off the tee over a small creek and provides a bit of a breather before the demanding final three holes. The second shot from the fairway leaves most golfers with a view of only the top of the pin to an undulating green. Be confident and trust your yardage on your approach shot. There are no greenside bunkers on this hole, and for good reason. The green is in a bowl like setting rising from front to back and is protected by a false side on the right and a large ridge on the left. Reading the green is the key to a good score, so be sure to pay attention on your first putt and dont let the green get the best of you.
- Yardage : Cobalt Tee 388
- Yardage : Gold Tee 375
- Yardage : Silver Tee 346
- Yardage : Copper Tee 301
- Yardage : Pewter Tee 260
- Men's Handicap : 10
- Ladies' Handicap : 12
Course Summary |
||
| Tees | Mens Rating | Ladies Rating |
|---|---|---|
| Cobalt Tees | 74.5/138 | - |
| Gold Tees | 72.4/135 | - |
| Silver Tees | 70.3/129 | 76.9/147 |
| Copper Tees | 67.4/126 | 72.7/140 |
| Pewter Tees | 65.0/118 | 69.5/128 |
16th Hole – Par 4
This strong and straight away par four starts one of the best final loops anywhere in golf, as the final three holes are great examples of a closing par four, par three and par five. The stacked tee deck complex offers panoramic views and a dramatic tee shot down and across a creek bed angling from right to left. The views afford everyone a look back to the Clubhouse, over to the Escarpment and across Georgian Bay. The tee shot to the fairway below is guarded by the lone fairway bunker on the left and forest on the right. The green favours an approach shot from the left side of the fairway, and is bunkered on both sides. Walking away with par on this exciting par four, with its challenging green, is always a great score.
- Yardage : Cobalt Tee 466
- Yardage : Gold Tee 443
- Yardage : Silver Tee 409
- Yardage : Copper Tee 378
- Yardage : Pewter Tee 322
- Men's Handicap : 2
- Ladies' Handicap : 6
Course Summary |
||
| Tees | Mens Rating | Ladies Rating |
|---|---|---|
| Cobalt Tees | 74.5/138 | - |
| Gold Tees | 72.4/135 | - |
| Silver Tees | 70.3/129 | 76.9/147 |
| Copper Tees | 67.4/126 | 72.7/140 |
| Pewter Tees | 65.0/118 | 69.5/128 |
17th Hole – Par 3
This breathtaking par three angling from left to right over water takes you to an expansive green protected by bunkers on the front right and across the entire back. The green is crested in the middle to separate left from right, and there is a degree of safe haven for tee shots missed to the left of the green. Pin placement will determine your strategy off the tee, and a back right pin placement will test your confidence for a very aggressive line to access it; anything hit long and not in the back bunkers will be rewarded by the back slope of the green and a roll back down to the pin. With only two holes to go to finish your round, be sure to focus on the task at hand rather than thinking ahead to eighteen. Par is always a great score here as you head to the home hole.
- Yardage : Cobalt Tee202
- Yardage : Gold Tee 184
- Yardage : Silver Tee 174
- Yardage : Copper Tee 151
- Yardage : Pewter Tee 121
- Men's Handicap : 16
- Ladies' Handicap : 16
Course Summary |
||
| Tees | Mens Rating | Ladies Rating |
|---|---|---|
| Cobalt Tees | 74.5/138 | - |
| Gold Tees | 72.4/135 | - |
| Silver Tees | 70.3/129 | 76.9/147 |
| Copper Tees | 67.4/126 | 72.7/140 |
| Pewter Tees | 65.0/118 | 69.5/128 |
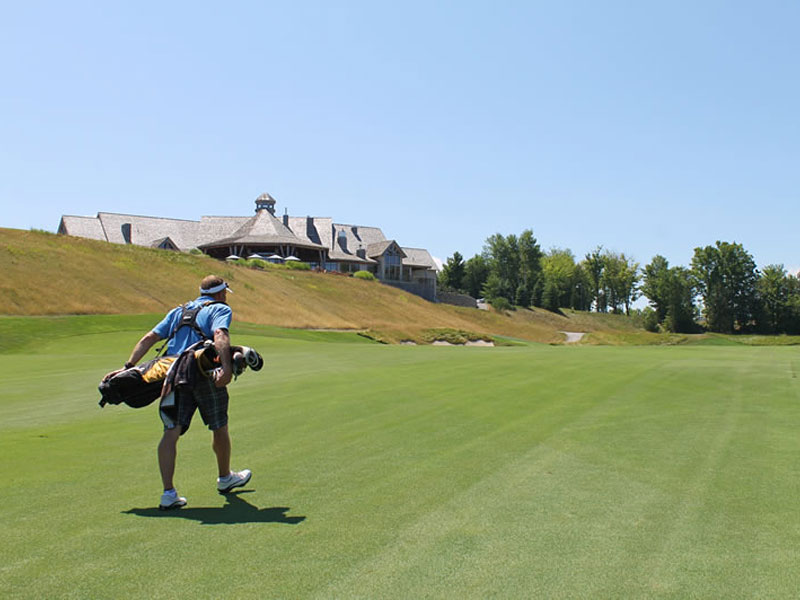
18th Hole – Par 5
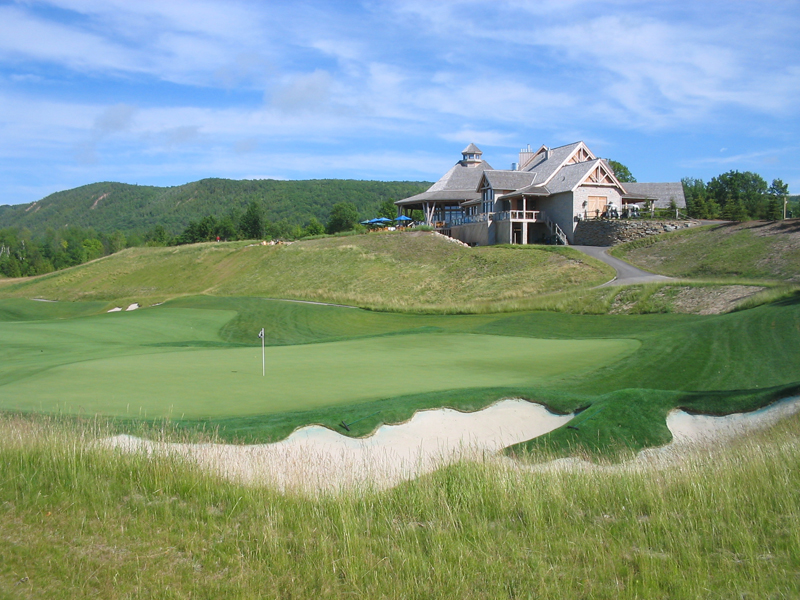
The home hole is truly a classic three shot par five in a majestic setting. Measuring over six hundred yards and climbing some thirty feet in elevation towards the Clubhouse, a solid tee shot is needed for position on the second shot to carry the deep creek that dissects the fairway. A short tee shot or one finding the fairway bunkers on the left or right side requires a decision for whether or not you can carry the creek on the second shot. Provided your second shot lands in the fairway with some length while avoiding the next four fairway bunkers, you will have an uphill approach to a large back to front rolling green protected by greenside bunkers front right and back left. A third shot from the right side of the fairway in this natural amphitheatre setting gives you the best views of the green, as well as your fellow Members sitting high atop on the Clubhouse patio. The number of challenging pin placements on this final green always make for great entertainment for golfers and spectators alike. Many a great match has been decided on this outstanding finishing hole. Truly a great finish to a great day of golf.
- Yardage : Cobalt Tee 608
- Yardage : Gold Tee 579
- Yardage : Silver Tee 553
- Yardage : Copper Tee 526
- Yardage : Pewter Tee 499
- Men's Handicap : 6
- Ladies' Handicap : 4
Course Summary |
||
| Tees | Mens Rating | Ladies Rating |
|---|---|---|
| Cobalt Tees | 74.5/138 | - |
| Gold Tees | 72.4/135 | - |
| Silver Tees | 70.3/129 | 76.9/147 |
| Copper Tees | 67.4/126 | 72.7/140 |
| Pewter Tees | 65.0/118 | 69.5/128 |